
 7:42
7:42
Dust management
GRIT in your Home Woodshop
See how GRIT's full dust management ecosystem works in a real home woodworking shop — automated gates, triggers, and monitoring in action.
Watch video and read transcript →
GRIT at Home videos
Home-shop product guides, dust-collection setup, installation, and troubleshooting. Search by the problem you are trying to solve.
18 videos
7:42
Dust management
See how GRIT's full dust management ecosystem works in a real home woodworking shop — automated gates, triggers, and monitoring in action.
Watch video and read transcript →
 1:32
1:32
Dust management
Learn how GRIT monitors air quality in your shop, tracking particulate levels and alerting you when conditions change.
Watch video and read transcript →
 2:45
2:45
Dust management
Quick guide to choosing the right GRIT products for your automated dust collection setup — from gates to triggers to the Hub.
Watch video and read transcript →
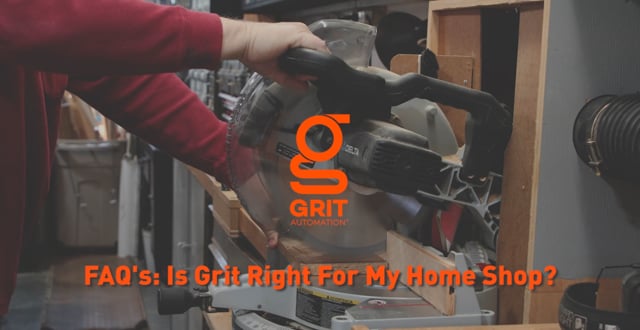 1:16
1:16
Tutorials & FAQs
Common questions answered about whether GRIT's automated dust collection system is a good fit for home woodworking shops.
Watch video and read transcript →
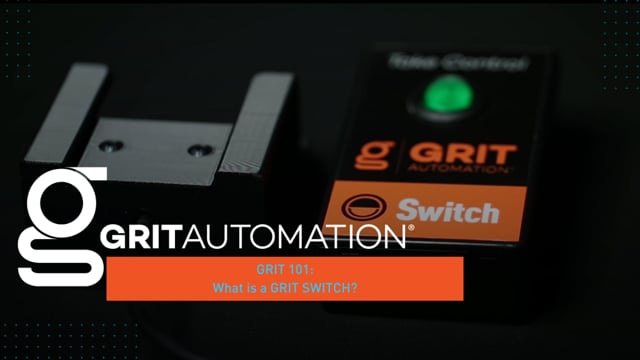 1:52
1:52
Tutorials & FAQs
Introduction to GRIT Switch — learn what it does, how it works, and where it fits in your automation setup.
Watch video and read transcript →
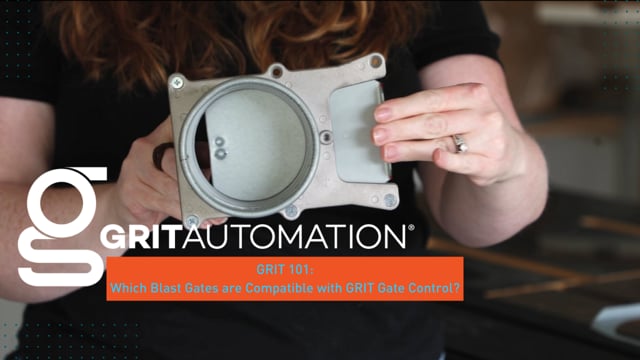 2:28
2:28
Tutorials & FAQs
Find out which blast gate brands and models work with GRIT Gate Control for automated dust collection.
Watch video and read transcript →
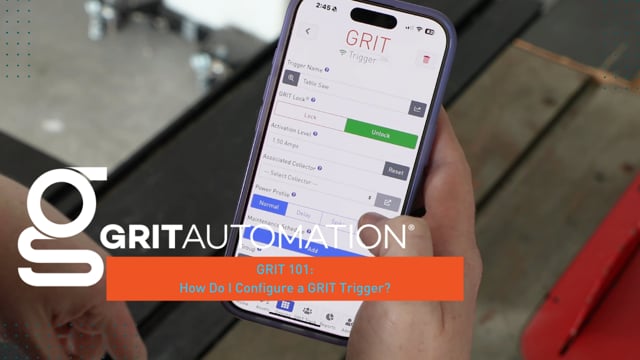 3:19
3:19
Tutorials & FAQs
Step-by-step walkthrough for configuring GRIT Trigger current sensors to automatically detect when tools are running.
Watch video and read transcript →
 0:54
0:54
Tutorials & FAQs
Not sure where to begin with GRIT? This quick guide helps you identify the right starting point for your shop.
Watch video and read transcript →
 4:54
4:54
Tutorials & FAQs
How to install GRIT MagSwitch on dust collectors that use a magnetic contactor for motor control.
Watch video and read transcript →
 25:19
25:19
Tutorials & FAQs
Complete installation guide for GRIT automated blast gate controls — mounting, wiring, and initial setup.
Watch video and read transcript →
 5:14
5:14
Tutorials & FAQs
Complete guide to calibrating your GRIT automated blast gates for accurate open/close positioning.
Watch video and read transcript →
 4:24
4:24
Tutorials & FAQs
Step-by-step MagSwitch installation specifically for Laguna brand dust collectors.
Watch video and read transcript →
 1:31
1:31
Tutorials & FAQs
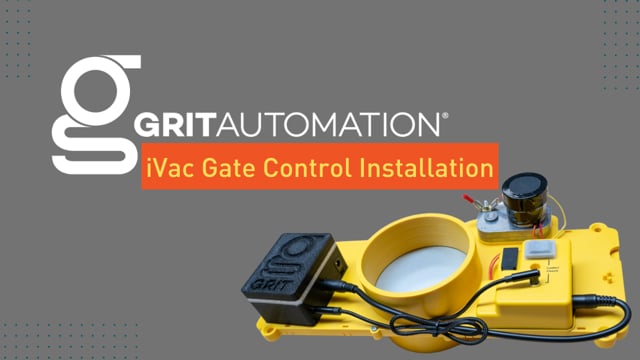
Setup and configuration guide for using GRIT with iVac automated blast gates.
Watch video and read transcript →
 4:15
4:15
Tutorials & FAQs
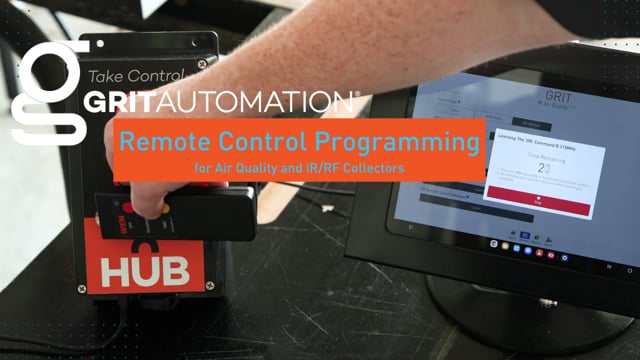
How to program and configure GRIT remote controls for manual override of your automated system.
Watch video and read transcript →
 3:51
3:51
Tutorials & FAQs
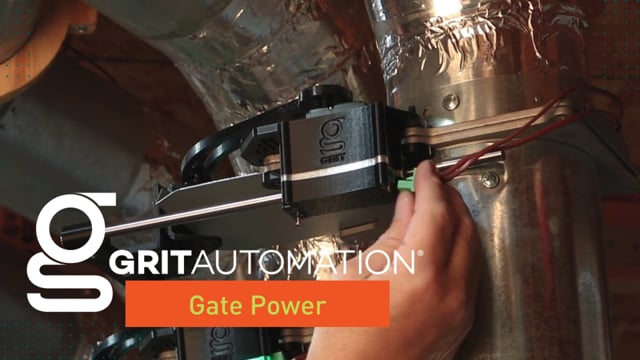
Understanding power requirements and wiring for GRIT automated blast gates.
Watch video and read transcript →
 1:05
1:05
Troubleshooting
Quick fixes for when the GRIT App isn't loading properly on your phone or tablet.
Watch video and read transcript →
 0:34
0:34
Troubleshooting
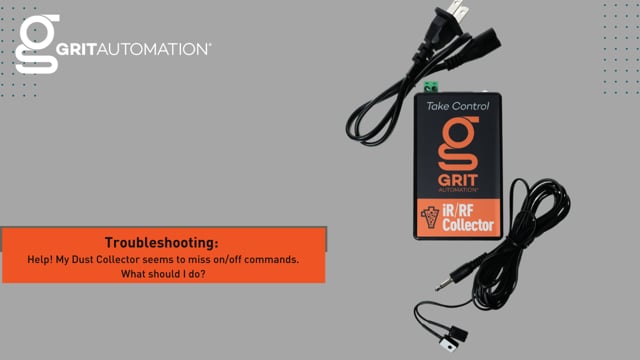
What to do when your dust collector isn't responding to commands from the iR/RF Collector module.
Watch video and read transcript →
 0:43
0:43
Troubleshooting
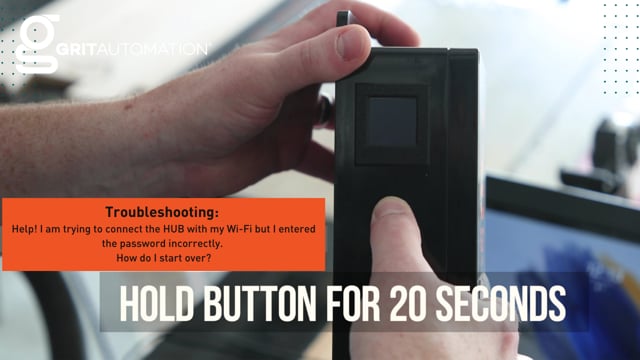
How to reset your GRIT Hub's network settings when you need to reconnect or change WiFi networks.
Watch video and read transcript →
No Home-shop videos match that search. Try a product name, installation task, or symptom.
{"version":1,"genericTerms":["gate","grit","product","shop","system","tool","video"],"stopWords":["a","an","and","are","can","do","does","for","how","i","in","is","it","my","of","on","the","this","to","what","where","why","with"],"concepts":[{"phrases":["gate","blast gate","gate control"]},{"phrases":["dust collector","collector"]},{"phrases":["wifi","wi fi","wireless","network connection"]},{"phrases":["wont close","will not close","does not close","not closing","binding","sticking","stuck","jammed"]},{"phrases":["wont open","will not open","does not open","not opening"]},{"phrases":["wont load","will not load","does not load","not loading"]},{"phrases":["not working","wont work","will not work","does not work","doesnt work","not responding","isnt responding","does not respond","doesnt respond","missing commands"]},{"phrases":["wont connect","will not connect","does not connect","doesnt connect","not connecting","reconnect","network reset","reset network"]},{"phrases":["setup","configure","configuration","program","programming"]},{"phrases":["install","installation","mount","mounting"]},{"phrases":["calibrate","calibration","calibrating"]}],"documents":[{"slug":"grit-home-woodshop","category":"dust-management","title":"GRIT in your Home Woodshop","description":"See how GRIT's full dust management ecosystem works in a real home woodworking shop — automated gates, triggers, and monitoring in action.","tags":["home","woodshop","woodworking","dust collection","workshop","demo","overview","hobby","setup","walkthrough","marco","getting started","installation","tutorial"],"takeaways":["A GRIT home-shop system starts with the Hub and adds a Trigger to each controlled tool.","Collector devices and retrofit Gate Controls automate dust collection as tools are used.","Optional dust-bin and air-quality sensors add fill-level and filtration automation."],"chapters":[{"start":0,"title":"GRIT for shops of any size"},{"start":42,"title":"Install the GRIT Hub"},{"start":126,"title":"Add Triggers to tools"},{"start":184,"title":"Choose a Collector device"},{"start":216,"title":"Retrofit Gate Controls"},{"start":278,"title":"Automatic tool and gate demonstration"},{"start":342,"title":"Add a dust-bin sensor"},{"start":372,"title":"Automate air filtration"}],"passages":[{"start":0,"text":"Hi, my name is Mark Agneto with GRIT Automation and today we wanted to show and explain how you can implement the GRIT Automation system into your home shop.","source":"reviewed-transcript"},{"start":16,"text":"So whether it's large or small, GRIT has devices to satisfy any tool that's out there.","source":"reviewed-transcript"},{"start":21,"text":"there. Many of our customers sometimes don't realize that the GRIT Automation","source":"reviewed-transcript"},{"start":25.38,"text":"system can apply to a small personal shop, typically because they see it in","source":"reviewed-transcript"},{"start":29.7,"text":"large universities or larger shops and think that it might be too much for them.","source":"reviewed-transcript"},{"start":33.72,"text":"But we're here today to explain and show that GRIT is sized for any size shop,","source":"reviewed-transcript"},{"start":40.68,"text":"including your small home shop. So let's get started and we'll show you the types","source":"reviewed-transcript"},{"start":45.36,"text":"of devices you're going to need. To begin with, every GRIT system, no matter what,","source":"reviewed-transcript"},{"start":49.44,"text":"starts with the GRIT Hub and it's the brains of the operation. And you'll pick","source":"reviewed-transcript"},{"start":54.36,"text":"a spot centrally located in your shop to put it. So on the side of the hub there's","source":"reviewed-transcript"},{"start":59.82,"text":"a QR code that's generated when setting up your system for the first time. On the","source":"reviewed-transcript"},{"start":65.52,"text":"front of the hub you'll see three buttons. The lock, unlock, and bind button.","source":"reviewed-transcript"},{"start":70.44,"text":"When you come into your shop you can simply unlock your entire shop by the","source":"reviewed-transcript"},{"start":74.32,"text":"press of a button and the green light indicates that all of your tools are now","source":"reviewed-transcript"},{"start":79.18,"text":"accessible and ready for use. The bind button in the middle is when setting up your shop. It's what","source":"reviewed-transcript"},{"start":86.38,"text":"communicates and allows new devices into the GRIT system. Power and ethernet cable on the bottom.","source":"reviewed-transcript"},{"start":93.34,"text":"The GRIT Hub can be connected to your local network by either using an ethernet cable,","source":"reviewed-transcript"},{"start":99.34,"text":"and there's a jack on the bottom here, you can connect wirelessly to your network, or the GRIT","source":"reviewed-transcript"},{"start":105.74,"text":"hub can operate by itself without any internet connection and an antenna and","source":"reviewed-transcript"},{"start":111.92,"text":"programming eye and ventilation on the other side. Again every GRIT system","source":"reviewed-transcript"},{"start":116.24,"text":"starts with the GRIT Hub it is the brains of the operation and it's going","source":"reviewed-transcript"},{"start":120.02,"text":"to communicate with every other device that is part of your home shop system.","source":"reviewed-transcript"},{"start":124.22,"text":"After the GRIT Hub you're gonna add a trigger to every tool in your shop. GRIT","source":"reviewed-transcript"},{"start":129.96,"text":"offers an entire spectrum of triggers ranging from 120 volts all the way up to","source":"reviewed-transcript"},{"start":135.12,"text":"480-volt three-phase. The GRIT Trigger monitors power and can tell whether your tool is on or not. The LED","source":"reviewed-transcript"},{"start":142.96,"text":"indicator light on top of each trigger will illuminate red or green showing whether the","source":"reviewed-transcript"},{"start":149.2,"text":"tool is locked or unlocked. And this is what enables GRIT to automate your dust collector.","source":"reviewed-transcript"},{"start":156,"text":"The GRIT Trigger also allows for locking and unlocking the tool in your shop.","source":"reviewed-transcript"},{"start":160.56,"text":"This is done simply by pressing a button on the hub or in the GRIT app. After putting triggers on","source":"reviewed-transcript"},{"start":167.88,"text":"each one of the tools in your shop, the next thing you'll want to do is add a collector device to","source":"reviewed-transcript"},{"start":172.62,"text":"your collection system. In this example, we have a 120-volt collector and we're just adding our","source":"reviewed-transcript"},{"start":179.34,"text":"device in line with the collector and it's as simple as plugging it in and it into the wall.","source":"reviewed-transcript"},{"start":186.96,"text":"GRIT offers 120-volt and 220-volt MagSwitch Collectors, an IR/RF collector device, which is","source":"reviewed-transcript"},{"start":196.44,"text":"if your collector has a remote, as well as a VFD device, your variable frequency drive. The next","source":"reviewed-transcript"},{"start":204.24,"text":"thing to add to your automated collection system is the GRIT Gate Control. The GRIT Gate Control","source":"reviewed-transcript"},{"start":210.12,"text":"retrofits onto your existing blast gate, so there's no need to take apart existing systems","source":"reviewed-transcript"},{"start":216.46,"text":"You add the GRIT Gate Control device to your existing metal blast gate.","source":"reviewed-transcript"},{"start":221.46,"text":"GRIT offers sizes from 2.5 inches all the way up to 12 inches.","source":"reviewed-transcript"},{"start":226.46,"text":"The GRIT Gate Control devices are powered with a 9-volt power supply.","source":"reviewed-transcript"},{"start":231.46,"text":"It's done easily by daisy-chaining all of your gates together to the one power supply instead of needing an outlet for each location.","source":"reviewed-transcript"},{"start":241.46,"text":"The GRIT Gate Control has a visual indicator of being red or green showing","source":"reviewed-transcript"},{"start":248,"text":"whether it's open or closed. Green being open, red being closed. Once you've","source":"reviewed-transcript"},{"start":253.64,"text":"installed the entire GRIT system in your shop and configured it with the GRIT app,","source":"reviewed-transcript"},{"start":257.54,"text":"you simply just use your tools in your shop and things are automated. I can come","source":"reviewed-transcript"},{"start":263.6,"text":"and use my spindle sander and my disc drum sander and my table saw and I don't","source":"reviewed-transcript"},{"start":270.14,"text":"to think about any configuration at this point. So I can show you that I'm going to turn on all","source":"reviewed-transcript"},{"start":274.86,"text":"three tools and the collector and the blast gates configure themselves automatically.","source":"reviewed-transcript"},{"start":283.02,"text":"I can even come to my table saw.","source":"reviewed-transcript"},{"start":287.42,"text":"And here we'll see that we actually have branch gates that are going to be responsive also.","source":"reviewed-transcript"},{"start":291.66,"text":"So I have all of these gates open and I can walk around and use whatever tool I need.","source":"reviewed-transcript"},{"start":308.4,"text":"So you can see that I've done nothing other than go up to my tools and use them.","source":"reviewed-transcript"},{"start":312.78,"text":"This leads into the design of your shop.","source":"reviewed-transcript"},{"start":315.8,"text":"You can do things differently than with a manual system.","source":"reviewed-transcript"},{"start":318.92,"text":"able to put blast gates in higher locations out of the way. The GRIT gate","source":"reviewed-transcript"},{"start":323.32,"text":"control system is highly adaptable to any shop. GRIT can do a variety of","source":"reviewed-transcript"},{"start":329.68,"text":"configurations. Something you can add on to your dust collection system is a dust","source":"reviewed-transcript"},{"start":334.82,"text":"bin sensor. Older systems typically don't have them, some of the newer ones do.","source":"reviewed-transcript"},{"start":339.14,"text":"Simply drill a hole in the top, insert the sensor, and tighten the nut on the","source":"reviewed-transcript"},{"start":346.88,"text":"underside. Also we have a red light that indicates whether your dustbin is full","source":"reviewed-transcript"},{"start":354.44,"text":"or not. It's important that after emptying your dustbin that you clean off","source":"reviewed-transcript"},{"start":360.26,"text":"the sensor to ensure you don't have false readings. GRIT also offers a way to","source":"reviewed-transcript"},{"start":367.7,"text":"automate your air filtration system by using GRIT's air quality device. Simply","source":"reviewed-transcript"},{"start":373.12,"text":"plug your air filtration system into it and it into the wall. It satisfies IR and","source":"reviewed-transcript"},{"start":378.82,"text":"RF remotes as well as just being able to turn your air filtration system on or","source":"reviewed-transcript"},{"start":383.72,"text":"off using the GRIT app. User levels can be put in meaning the activation level","source":"reviewed-transcript"},{"start":390.52,"text":"you want your collector to turn on can be adjusted however you see fit. The GRIT","source":"reviewed-transcript"},{"start":395.14,"text":"air quality device brings air through the side and samples it and depending on","source":"reviewed-transcript"},{"start":400.5,"text":"the user activation level can turn on or off your air quality system. If you have","source":"reviewed-transcript"},{"start":406.26,"text":"an RF remote, all you have to do is plug your device in. If your device operates","source":"reviewed-transcript"},{"start":411.62,"text":"off of an IR remote, GRIT has a sensor that you run to the eye on your air","source":"reviewed-transcript"},{"start":418.26,"text":"filtration system. The GRIT Air Quality device can also be activated by a GRIT","source":"reviewed-transcript"},{"start":423.62,"text":"trigger. For example, if when you use your table saw you know that you want your","source":"reviewed-transcript"},{"start":428.88,"text":"air filtration system on it can automatically do that before it actually","source":"reviewed-transcript"},{"start":433.44,"text":"reaches the user levels that you set. So we hope this shows how the GRIT","source":"reviewed-transcript"},{"start":438.66,"text":"automation system can be implemented into your own home shop and how it can","source":"reviewed-transcript"},{"start":442.98,"text":"make the quality of your time better. If you have any questions please reach out","source":"reviewed-transcript"},{"start":448.12,"text":"to us and let us help you design the GRIT Automation system that's right for you.","source":"reviewed-transcript"},{"start":458.88,"text":"you","source":"reviewed-transcript"}]},{"slug":"grit-air-quality","category":"dust-management","title":"GRIT Air Quality","description":"Learn how GRIT monitors air quality in your shop, tracking particulate levels and alerting you when conditions change.","tags":["air quality","sensors","monitoring","dust","particulate","pm2.5","environment"],"takeaways":["GRIT Air Quality can automate an air-filtration system through power, IR, or RF control.","The user sets the particulate activation level that determines when filtration turns on and off.","A GRIT Trigger can start filtration proactively when a specific tool is used."],"chapters":[{"start":0,"title":"Connect and control an air-filtration system"},{"start":26,"title":"Set the activation level"},{"start":41,"title":"Configure RF or IR control"},{"start":59,"title":"Activate filtration from a Trigger"}],"passages":[{"start":0,"text":"GRIT also offers a way to automate your air filtration system by using GRIT's air quality device. Simply plug your air filtration system into it and it into the wall. It satisfies IR and RF remotes as well as just being able to turn your air filtration system on or off using the GRIT app.","source":"reviewed-transcript"},{"start":26,"text":"User levels can be put in, meaning the activation level you want your collector","source":"reviewed-transcript"},{"start":32.06,"text":"to turn on can be adjusted however you see fit. The GRIT Air Quality device","source":"reviewed-transcript"},{"start":36.28,"text":"brings air through the side and samples it and depending on the user activation","source":"reviewed-transcript"},{"start":41.78,"text":"level can turn on or off your air quality system. If you have an RF remote,","source":"reviewed-transcript"},{"start":47.32,"text":"all you have to do is plug your device in. If your device operates off of an IR","source":"reviewed-transcript"},{"start":52.92,"text":"remote, GRIT has a sensor that you run to the eye on your air filtration system.","source":"reviewed-transcript"},{"start":59.6,"text":"The GRIT Air Quality device can also be activated by a GRIT Trigger. For example,","source":"reviewed-transcript"},{"start":65.56,"text":"if when you use your table saw you know that you want your air filtration system","source":"reviewed-transcript"},{"start":70.32,"text":"on, it can automatically do that before it actually reaches the user levels that","source":"reviewed-transcript"},{"start":75.96,"text":"you set. If you have any questions please reach out to us and let us help you","source":"reviewed-transcript"},{"start":81.54,"text":"design the GRIT Automation system that's right for you.","source":"reviewed-transcript"}]},{"slug":"grit-101-dust-collection-products","category":"dust-management","title":"GRIT 101: What Products Do I Need for Automated Dust Collection?","description":"Quick guide to choosing the right GRIT products for your automated dust collection setup — from gates to triggers to the Hub.","tags":["grit 101","dust collection","products","getting started","which products","gate","trigger","hub","automated"],"takeaways":["Every GRIT dust management system starts with a GRIT Hub.","Choose one GRIT Trigger per tool using the tool's phase, voltage, and amperage.","Add one collector control per dust collector, one Gate Control per blast gate, and enough Power Banks for the gate controls."],"chapters":[{"start":9,"title":"Start with the GRIT Hub"},{"start":20,"title":"Choose a Trigger for each tool"},{"start":60,"title":"Match the collector control"},{"start":99,"title":"Size the Gate Controls"},{"start":117,"title":"Add Power Banks and review the system"}],"passages":[{"start":9.07,"text":"I'm Jacqueline from GRIT. Today we're going to talk about what you need to build your perfect GRIT system in the shop. Every single GRIT system starts with a GRIT Hub, then we can build your perfect system from there. If you're wanting automated dust collection and blast gates, then you will need a Trigger for each one of your tools. We have lots to choose from. Basically, you are looking to gather the information of the phase of power for your tool, the voltage, and the amperage draw. And from there, then you can select from a wide array or variety of Triggers","source":"reviewed-transcript"},{"start":46.11,"text":"that we offer. Most of our Triggers for home shop use are a nice plug-and-play option, making installations super easy, super fast. After you find the right Trigger for your tool, then you will need to select the correct Collector device for your dust collector or dust collectors. You can have an unlimited amount of dust collectors in your system. Again, just like Triggers, we have plug-and-play options for single-phase collectors like a simple JET, something that's on and off. You would use a 120V or 220V Collector. If there's a contactor or a motor starter, you're going to","source":"reviewed-transcript"},{"start":86.11,"text":"be selecting between our MagSwitch Collector or our iR/RF Collector if it comes with a remote control. After that, then you are going to be selecting the number and sizes of Gate Controls that you need. We offer two-and-a-half-inch all the way up to 12-inch. You're going to be retrofitting these onto your existing metal blast gate; something that has a nice, easy slide without any built-in locking mechanisms is what's going to be working for you. And then finally, after you","source":"reviewed-transcript"},{"start":117.87,"text":"pick up all of your Gate Controls, you're going to need a Power Bank. If you have questions about how many of these you need, just shoot us an email. So that's how you put together your GRIT system. It's super simple: a Hub, a Trigger for each tool, a Collector for each dust collector, a Gate Control for each one of your blast gates, and a Power Bank to power everything up. If you have any other questions or want to learn more, please head to our website to watch our","source":"reviewed-transcript"},{"start":142.75,"text":"other videos or feel free to contact us via our contact page. We're happy to answer any questions you have or help you put together your own estimate.","source":"reviewed-transcript"}]},{"slug":"faq-right-for-home-shop","category":"tutorials","title":"FAQ: Is GRIT Right For My Home Shop?","description":"Common questions answered about whether GRIT's automated dust collection system is a good fit for home woodworking shops.","tags":["faq","home shop","hobby","woodworking","right for me","getting started"],"takeaways":["GRIT is modular and scalable for small home shops as well as larger installations.","Dust-collection automation removes the need to manually start the collector and adjust blast gates.","After setup, turning on a tool can automatically start the collector and open the appropriate gates."],"chapters":[{"start":0,"title":"GRIT can fit a small shop"},{"start":23,"title":"Modular and scalable design"},{"start":34,"title":"Automate dust collection"},{"start":53,"title":"Automatic collector and gate response"}],"passages":[{"start":0,"text":"Is it too much for me? I have a small home shop or I'm a small business and it's just me and my business partner.","source":"reviewed-transcript"},{"start":15.36,"text":"I think that they see our installations in our university and educational settings and it can make GRIT Automation feel unapproachable.","source":"reviewed-transcript"},{"start":23.36,"text":"But that's absolutely not the case because we are modular and scalable.","source":"reviewed-transcript"},{"start":29.86,"text":"We fit your shop exactly where it is.","source":"reviewed-transcript"},{"start":32.3,"text":"We are made for your shop, period.","source":"reviewed-transcript"},{"start":34.44,"text":"One of the reasons that people are interested in GRIT is for our dust collection automation.","source":"reviewed-transcript"},{"start":40.84,"text":"I want to be able to come into my shop, get straight to work.","source":"reviewed-transcript"},{"start":44.56,"text":"I don't want to have to worry about turning on my dust collector, adjusting my blast gates.","source":"reviewed-transcript"},{"start":49.8,"text":"And that's where GRIT can absolutely help you out in your shop.","source":"reviewed-transcript"},{"start":53.64,"text":"So you come in, you turn on a tool, everything is auto-configured once you set it up.","source":"reviewed-transcript"},{"start":59.44,"text":"The dust collector turns on, the appropriate blast gates open, and you're off to the races.","source":"reviewed-transcript"}]},{"slug":"grit-101-what-is-switch","category":"tutorials","title":"GRIT 101: What is GRIT Switch?","description":"Introduction to GRIT Switch — learn what it does, how it works, and where it fits in your automation setup.","tags":["grit 101","switch","product","what is","overview","introduction"],"takeaways":["GRIT Switch is a rechargeable remote-style Trigger for manual control of configured automations.","It can start a collector and open one or more configured blast gates.","It is useful for floor sweeps and lathes where dust collection should be controlled manually."],"chapters":[{"start":0,"title":"What GRIT Switch is"},{"start":26,"title":"Configure Switch like a Trigger"},{"start":54,"title":"Floor-sweep and lathe use cases"},{"start":79,"title":"Collector and gate demonstration"}],"passages":[{"start":0,"text":"Hi, I'm Jacqueline with GRIT and today I want to talk a little bit about our GRIT Switch.","source":"reviewed-transcript"},{"start":13.84,"text":"So we have all kinds of triggers in the system that connect directly to the tools, but we","source":"reviewed-transcript"},{"start":19.2,"text":"also have a remote style trigger called the Switch that allows you to have a little bit","source":"reviewed-transcript"},{"start":24.72,"text":"more manual control over some of the actions in your GRIT system. So the GRIT Switch is a little","source":"reviewed-transcript"},{"start":34.8,"text":"trigger that you can clip on your belt loop or there's a cradle, a charging cradle that it comes","source":"reviewed-transcript"},{"start":40.32,"text":"with. You can operate it from there as well, but it configures exactly like a trigger in that you","source":"reviewed-transcript"},{"start":47.04,"text":"can configure it to turn on a dust collector and open any number of gates that you want","source":"reviewed-transcript"},{"start":52.56,"text":"to control with this. Some uses that this is perfect for would be a floor sweep or","source":"reviewed-transcript"},{"start":59.78,"text":"a lathe where you want to have a little bit more control over when the dust","source":"reviewed-transcript"},{"start":64.84,"text":"collection is initiated. Whether you use it for turning let's say a table leg or","source":"reviewed-transcript"},{"start":71.24,"text":"doing sanding sometimes you want your dust collection on sometimes you don't. A","source":"reviewed-transcript"},{"start":75.4,"text":"switch is going to be the perfect solution for that. So in this case I have","source":"reviewed-transcript"},{"start":79.48,"text":"our switch configured where it's going to turn on our collector, open up a couple of blast gates,","source":"reviewed-transcript"},{"start":84.84,"text":"and you can see right here.","source":"reviewed-transcript"},{"start":92.6,"text":"If you have any other questions or want to learn more, please head to our website to","source":"reviewed-transcript"},{"start":96.2,"text":"watch our other videos or feel free to contact us via our contact page. We're happy to","source":"reviewed-transcript"},{"start":101.88,"text":"answer any questions you have or help you put together your own estimate.","source":"reviewed-transcript"}]},{"slug":"grit-101-compatible-blast-gates","category":"tutorials","title":"GRIT 101: Which Blast Gates are Compatible?","description":"Find out which blast gate brands and models work with GRIT Gate Control for automated dust collection.","tags":["grit 101","blast gates","compatible","gate control","compatibility","which gates"],"takeaways":["GRIT Gate Control retrofits onto compatible metal blast gates; GRIT does not supply the blast gate itself.","The gate slide must move freely without a built-in locking mechanism or other resistance.","Several common metal and quick-connect gate styles work, while stiff locking-gate designs are not suitable retrofit candidates."],"chapters":[{"start":8,"title":"What GRIT Gate Control retrofits"},{"start":31,"title":"Material and slide requirements"},{"start":70,"title":"Examples of compatible gates"},{"start":90,"title":"A locking-gate design to avoid"},{"start":128,"title":"Questions and next steps"}],"passages":[{"start":8.43,"text":"Hi, I'm Jacqueline with GRIT. Today I wanna talk a little bit about gate control and retrofitting onto your existing metal blast gates. We get a lot of questions about whether we sell blast gates, we do not, and what types of blast gates we retrofit onto. So let me walk through the ones that do work, that are compatible, and the one that does not. So you want a metal blast gate, not a plastic blast gate. You want a blast gate that has a free sliding slide. It does not have to have this extra part,","source":"reviewed-transcript"},{"start":44.65,"text":"there are some that don't have that open side to the slide so that it's a little more compact, totally your choice. They have this little locking mechanism, we just recommend that you take that all the way out. If you just loosen it, sometimes the vibration from an opening and closing repeatedly can start to wiggle it back in, which you wouldn't want any resistance to the gate control that is opening and closing your blast gate. So that style of gate is good. I know Jet, Oneida, POWERTEC all have their own versions, all of those are just fine.","source":"reviewed-transcript"},{"start":78.33,"text":"We also retrofit nicely onto Nordfab quick connect. Again, if you're looking for this nice slide, nice and smooth, no resistance. There is a new kind of POWERTEC gate, however, that doesn't play nicely with our gate control. It is the new version that has this locking feature. It is difficult, you have to put some muscle into it, even when you're controlling it manually. So this is not a good candidate for our gate control mechanisms. One way to easily tell if you're not sure, if you're searching online, is this has kind of like a two hole layout","source":"reviewed-transcript"},{"start":121.69,"text":"and the type of gate that we retrofit onto really nicely has three. If you have any other questions or want to learn more, please head to our website to watch our other videos or feel free to contact us via our contact page. We're happy to answer any questions you have or help you put together your own estimate.","source":"reviewed-transcript"}]},{"slug":"grit-101-configure-trigger","category":"tutorials","title":"GRIT 101: How Do I Configure a GRIT Trigger?","description":"Step-by-step walkthrough for configuring GRIT Trigger current sensors to automatically detect when tools are running.","tags":["grit 101","trigger","configure","setup","current sensor","configuration","how to"],"takeaways":["Label the Trigger and review both its activation level and power profile.","Use the Spike power profile for a SawStop so startup electronics do not cause an emergency lock.","Use the power graph to confirm the activation threshold, then associate the collector and all applicable gates."],"chapters":[{"start":0,"title":"Trigger configuration overview"},{"start":32,"title":"Label the inline 220-volt Trigger"},{"start":47,"title":"Set activation level and power profile"},{"start":94,"title":"Verify the threshold on the graph"},{"start":148,"title":"Associate the collector and gates"}],"passages":[{"start":0,"text":"Hi, I'm Jacqueline from GRIT. Today I want to do a little bit of a walkthrough of how to properly configure your trigger.","source":"reviewed-transcript"},{"start":16.5,"text":"So we're going to do a configuration on our SawStop today.","source":"reviewed-transcript"},{"start":21.5,"text":"So I am in the process of setting up my shop and configuring my triggers.","source":"reviewed-transcript"},{"start":27.5,"text":"I have a couple left and so I want to run through that process today with you guys.","source":"reviewed-transcript"},{"start":32.44,"text":"I have one of our inline 220-volt Trigger connected to our SawStop table saw right here.","source":"reviewed-transcript"},{"start":40.86,"text":"First thing I can do is just label it appropriately.","source":"reviewed-transcript"},{"start":47.28,"text":"A couple of things that we will surely want to do is look at both the activation level","source":"reviewed-transcript"},{"start":54.54,"text":"and the power profile for this.","source":"reviewed-transcript"},{"start":57.04,"text":"I do know that the SawStop has a computer and some capacitors that charge up.","source":"reviewed-transcript"},{"start":63.96,"text":"You will want to change the power profile from normal.","source":"reviewed-transcript"},{"start":68.38,"text":"If you don't, you might notice that in an attempt to unlock the trigger, it's going","source":"reviewed-transcript"},{"start":72.7,"text":"to stay locked and start flashing red.","source":"reviewed-transcript"},{"start":76.36,"text":"That's an emergency lock, and it's because it's going to be sensing power above that","source":"reviewed-transcript"},{"start":80.68,"text":"1.5-amp activation level as the computer in the table saw is charging up. So we","source":"reviewed-transcript"},{"start":88.8,"text":"are going to change the power profile to spike and then if we're not sure what","source":"reviewed-transcript"},{"start":94.54,"text":"the activation level should be we can always open up that graph and turn on","source":"reviewed-transcript"},{"start":100.8,"text":"the saw.","source":"reviewed-transcript"},{"start":103.3,"text":"Here you can see it starts right up. It's well above that 1.5-amp activation level,","source":"reviewed-transcript"},{"start":116.8,"text":"so we can keep that as is. If, for example, the saw ran below our preset activation level,","source":"reviewed-transcript"},{"start":125.94,"text":"we would need to drop it a little bit lower. But we're going to be just fine keeping it at 1.5","source":"reviewed-transcript"},{"start":132.28,"text":"and just making sure that we change our power profile to spike to allow for a computer to charge up and have a slight little bit of inrush current that we will delay the measurement of the GRIT system until after that occurs.","source":"reviewed-transcript"},{"start":147.92,"text":"Further configuration options would be associating it to a collector, which you can do here, and then you can also come here and associate its gate control.","source":"reviewed-transcript"},{"start":160.44,"text":"Now the way that we have it set up here in the shop is it is going to have its own tool gate,","source":"reviewed-transcript"},{"start":166.2,"text":"but we also have branch gates, so we're going to configure it with the branch gate as well.","source":"reviewed-transcript"},{"start":171.32,"text":"And that is how I go through the process of configuring a trigger. If you have any other","source":"reviewed-transcript"},{"start":179.82,"text":"questions or want to learn more, please head to our website to watch our other videos or feel free","source":"reviewed-transcript"},{"start":184.76,"text":"to contact us via our contact page. We're happy to answer any questions you have or help you put","source":"reviewed-transcript"},{"start":190.32,"text":"together your own estimate.","source":"reviewed-transcript"}]},{"slug":"faq-where-do-i-start","category":"tutorials","title":"FAQ: Where Do I Start?","description":"Not sure where to begin with GRIT? This quick guide helps you identify the right starting point for your shop.","tags":["faq","getting started","where to start","beginner","new user","first steps"],"takeaways":["Start an automated dust-collection project by contacting GRIT with a tool list.","Include phase, voltage, and amperage so GRIT can select appropriate Triggers and prepare an estimate.","GRIT supports tools from 120 volts through 480-volt three-phase, plus CNCs, lasers, lathes, and floor sweeps."],"chapters":[{"start":0,"title":"Where to start"},{"start":10,"title":"Contact GRIT with your goals"},{"start":19,"title":"Provide tool power details"},{"start":31,"title":"Supported tool range"}],"passages":[{"start":0,"text":"Where do I start?","source":"reviewed-transcript"},{"start":6.64,"text":"Where do I start is a question that I get probably more often than anything.","source":"reviewed-transcript"},{"start":10.72,"text":"And I would say that if your goal is to automate your dust collection, you start by contacting us.","source":"reviewed-transcript"},{"start":19.6,"text":"If you send us a list of your tools, the phase of power, the voltage, the amperage of your tools,","source":"reviewed-transcript"},{"start":25.04,"text":"we can get you an estimate that day. We have triggers that cover everything that you would","source":"reviewed-transcript"},{"start":31.2,"text":"potentially have in your shop from 120-volt all the way up to 480-volt three-phase. We work with CNCs and","source":"reviewed-transcript"},{"start":38.8,"text":"lasers and we even have a remote style switch for when you're using a lathe or a floor sweep.","source":"reviewed-transcript"}]},{"slug":"magswitch-install-contactor","category":"tutorials","title":"MagSwitch Installation — Any Collector with a Contactor","description":"How to install GRIT MagSwitch on dust collectors that use a magnetic contactor for motor control.","tags":["magswitch","installation","contactor","dust collector","wiring","motor","relay"],"takeaways":["Turn off the breaker and remove any built-in remote-start module before wiring the MagSwitch Collector.","Power the device from the incoming mains terminals and pass one motor lead through the current transformer.","Connect the four-wire harness to the magnetic coil and motor-starter terminals before closing the enclosure."],"chapters":[{"start":0,"title":"Installation scope and breaker safety"},{"start":30,"title":"Remove a remote-start module and open the enclosure"},{"start":70,"title":"Connect incoming power"},{"start":130,"title":"Install the current transformer"},{"start":161,"title":"Connect the four-wire harness"},{"start":222,"title":"Route wires and close the enclosure"}],"passages":[{"start":0,"text":"We're going to walk through the installation of the GRIT MagSwitch Collector device on a Oneida V3000 Dust Collector.","source":"reviewed-transcript"},{"start":16.34,"text":"Before we start, don't forget to turn off the breaker.","source":"reviewed-transcript"},{"start":19.64,"text":"This process of setting up the MagSwitch collector device applies to any dust collector that has a magnetic contactor, like you see here.","source":"reviewed-transcript"},{"start":30.84,"text":"Some dust collectors, and many Oneida dust collectors, come with a remote start module built in.","source":"reviewed-transcript"},{"start":38.12,"text":"The first step will be to remove that module from inside of the contactor enclosure.","source":"reviewed-transcript"},{"start":43.12,"text":"This dust collector does not have that module so we're going to proceed after it had been removed if you had one.","source":"reviewed-transcript"},{"start":50.12,"text":"So first step, let's take off the cover.","source":"reviewed-transcript"},{"start":56.12,"text":"First thing you might notice is there's lots of wires, but don't worry, rest assured, we're going to walk through exactly how you connect the GRIT MagSwitch collector device to this contactor.","source":"reviewed-transcript"},{"start":66.12,"text":"Let's walk through what all of these different screw terminals are.","source":"reviewed-transcript"},{"start":70.12,"text":"First, the top level screw terminals, there's four in this contactor. There's wires coming","source":"reviewed-transcript"},{"start":78.58,"text":"from the incoming power from the wall and going into two contacts in the top of this contactor.","source":"reviewed-transcript"},{"start":86.76,"text":"That's the black wire and the white wire. This is the incoming power. These two is where we will","source":"reviewed-transcript"},{"start":92.12,"text":"plug in the wires from the GRIT two-wire harness for the power for our GRIT","source":"reviewed-transcript"},{"start":99.08,"text":"device. Start with the power wire. It looks like this. There are two wires, a","source":"reviewed-transcript"},{"start":103.76,"text":"red and a black, and they will plug into the mains power coming in from the wall","source":"reviewed-transcript"},{"start":111,"text":"and that will be on the top side of collector. This will work for both","source":"reviewed-transcript"},{"start":115.74,"text":"single-phase dust collectors and three-phase dust collectors.","source":"reviewed-transcript"},{"start":122.12,"text":"Now these two wires have been connected and now we have power for our GRIT device.","source":"reviewed-transcript"},{"start":130.64,"text":"Next step, let's tackle the current transformer.","source":"reviewed-transcript"},{"start":134.5,"text":"That's the little thing that looks like a doughnut.","source":"reviewed-transcript"},{"start":137.54,"text":"We need to put one of the wires going to the motor through this hole.","source":"reviewed-transcript"},{"start":142.9,"text":"For a single-phase dust collector, you'll have two wires coming out from the bottom.","source":"reviewed-transcript"},{"start":148.9,"text":"For a three-phase dust collector, you would have three.","source":"reviewed-transcript"},{"start":151.68,"text":"doesn't matter which of these you choose, just unscrew one of them and put it","source":"reviewed-transcript"},{"start":156.12,"text":"through the doughnut and then put the wire back into the bottom of the motor","source":"reviewed-transcript"},{"start":161.16,"text":"starter. Next we'll tackle the last of the wire harnesses. That's the wire","source":"reviewed-transcript"},{"start":170.1,"text":"harness that has four wires. It's got a blue, a red, a green, and a black. First","source":"reviewed-transcript"},{"start":175.98,"text":"step is all the way in the back of the contactor there's the second connection","source":"reviewed-transcript"},{"start":182.7,"text":"to our magnetic coil also referred to as A2. Plug the black wire into this port","source":"reviewed-transcript"},{"start":189.24,"text":"in the back of the contactor. Next we will be connecting the green and the red","source":"reviewed-transcript"},{"start":198.42,"text":"wires together and we're plugging it into the fourth connection in our","source":"reviewed-transcript"},{"start":203.94,"text":"contactor. And the final wire, the blue wire, plugs into the bottom of the motor","source":"reviewed-transcript"},{"start":210.7,"text":"starter at a port that has the number 95.","source":"reviewed-transcript"},{"start":221.82,"text":"So next it's time to feed all the wires from the GRIT MagSwitch Collector device","source":"reviewed-transcript"},{"start":226.42,"text":"through the hole that we drilled or popped out of the enclosure.","source":"reviewed-transcript"},{"start":236.18,"text":"And the final step is to plug in all of the wire harnesses to the to the wires","source":"reviewed-transcript"},{"start":244.32,"text":"that we just pushed through. There's only one way to connect each one so don't","source":"reviewed-transcript"},{"start":248.26,"text":"worry about connecting them incorrectly.","source":"reviewed-transcript"},{"start":256.42,"text":"Finally, make sure all of the wires are nice and tucked inside of the box so that nothing","source":"reviewed-transcript"},{"start":267.28,"text":"gets snagged when we put the lid back on.","source":"reviewed-transcript"},{"start":273.3,"text":"Attach the lid, screw everything in place.","source":"reviewed-transcript"},{"start":279.46,"text":"Go back to the breaker, turn on the switch, and we're installed.","source":"reviewed-transcript"},{"start":286.42,"text":"Thank you.","source":"reviewed-transcript"}]},{"slug":"gate-control-installation","category":"tutorials","title":"GRIT Gate Control Installation","description":"Complete installation guide for GRIT automated blast gate controls — mounting, wiring, and initial setup.","tags":["gate","installation","blast gate","setup","mounting","wiring","gate control","install"],"takeaways":["Start with a freely moving metal blast gate and prepare the slide so the actuator does not fight burrs, friction, or a stop bolt.","Use the supplied guides and brackets to keep the rod, bearing arm, and gate slide aligned before tightening the hardware.","Power and bind the Gate Control before attaching the actuator arm, then calibrate open and closed positions without leaving the servo under stress."],"chapters":[{"start":2,"title":"Compatible blast gates and installation kit"},{"start":59,"title":"Prepare and lubricate the gate slide"},{"start":302,"title":"Drill the mounting holes"},{"start":415,"title":"Install and align the rod brackets"},{"start":673,"title":"Attach the tab and slide brackets"},{"start":964,"title":"Power and bind the Gate Control"},{"start":1096,"title":"Center the actuator and attach the arm"},{"start":1250,"title":"Calibrate open and closed positions"},{"start":1461,"title":"Installation recap"}],"passages":[{"start":2.9,"text":"Hi, I'm Marco Unieto with GRIT Automation and today I wanted to show you the GRIT Gate Control System and how to install it and how to calibrate your arm properly during that installation. To begin with, the GRIT Gate Control retrofits onto metal blast gates. There's a variety of different brands out there, but the key is that they're a free moving metal blast gate. There's ones out there that they're developing now that have some locking mechanisms but it's all manual and our system won't really work on those.","source":"reviewed-transcript"},{"start":36.06,"text":"So you're better off just finding the inexpensive metal blast gate and we retrofit right onto that. So this kit comes with tools to help you install the device on your metal blast gate. We have a couple different screwdrivers, a nut driver, a drill bit for drilling holes in the tab of the blast gate along with the other parts that I'll go into a little more detail as we move along. Before we get started with installing the GRIT actuator onto the blast gate, we want to start with doing some prep work to it to ensure the best results.","source":"reviewed-transcript"},{"start":69.78,"text":"The larger the gate is, the more important it is to do this prep work. On a small two inch like this, two and a half inch, it slides pretty easily and the prep work doesn't always need to be done, but we suggest you do to ensure, again, the best results possible. So to start with, we've got our pull tab right here and we're going to take this slide out by removing the screws and opening up the body of the blast gate. So I'm just going to take a screwdriver, screw gun here and remove all six screws.","source":"reviewed-transcript"},{"start":108.86,"text":"Now on some units they won't have threaded bodies but they'll have a nut and bolt going through the housing and it'll be a little different but the approach is all the same. So we'll make sure we save all of our screws here and now I have the gate body taken apart and the slide taken apart. Now the first thing I'm going to do is to prep the slide and to do that, I'm going to use a file or sandpaper or something along those lines. I like to use a 120, maybe 220 sandpaper and we're going to sand off the corners,","source":"reviewed-transcript"},{"start":146.58,"text":"any sharp edges. You can rub your fingers over the edges and you can feel little burrs and some sharpness to it. So the goal is to remove all that and make it slide as smoothly as possible in the gate body. So I'm just going to work the edges here and it's not rocket science, you know, just be careful as you go and I'm going to make sure I get these corners and make sure everything is nice and smooth and I know that I've probably done a good job when I can take my thumb or","source":"reviewed-transcript"},{"start":183.49,"text":"finger and rub it along there and it just feels nice and glassy smooth and I think I've accomplished that here. So the slide is prepped, while I've got this open I'm going to just do a visual inspection, make sure there's no manufacturing defects, anything like that and, you know, this looks pretty good and if you want to take this one step further, we spray the insides with a silicone lubricant that really helps the sliding. It'll dry up enough that it's not going to gum up with dust unless you run your collector","source":"reviewed-transcript"},{"start":216.49,"text":"immediately after with a lot of dust into the gate body. Make sure I get the slides and in fact the face, it can't hurt to do the face also and I just know that the entire inside of the body is lubricated well and this sort of soaks into the metal and creates a better environment for the slide to operate. So that's lubricated, we've got the slide guide sanded down and we can put it back together. So another element that's important, I'll show you on this four inch, is that the stop","source":"reviewed-transcript"},{"start":257.01,"text":"nut here or the stop bolt, it's important to remove that. What can happen is throughout time, your gate's going to vibrate a bit and this sometimes can work its way in and cause friction on your gate, end of the day this isn't needed at all, especially once you're putting the GRIT Gate Control on. So make sure you remove it completely and it's gone. So next I'm going to put the screws back in place and tighten up the body. You don't need to put in these two right here and we ensure that it's sliding nice","source":"reviewed-transcript"},{"start":294.35,"text":"and you can see how nice this slides after I did that. I can feel the difference from the prep work that I've done on it. Alright so now that we have that part done, we've prepped the gate, we're going to move on to actually installing the gate actuator. To begin with, we're going to grab the drill guide and if you have multiple gates, you only want to use these once. They're made out of plastic. Once you send a drill bit in here, you're going to wallow out that hole a little bit","source":"reviewed-transcript"},{"start":320.41,"text":"and it will cause an error if you try to use this on another gate. So only use it once. You're going to slide it over the tab and you can usually just eyeball it center and we're going to take our drill bit that we provide and I'm going to make sure it's nice and centered on that tab and I'm going to drill my first hole. Alright so I've got my first hole. Now before I drill my second hole, I'm going to take this bit.","source":"reviewed-transcript"},{"start":362.51,"text":"You can use a little screw, a nail, anything like that but I'm going to stick it through the hole I drilled in the slide guide to ensure the alignment is proper. So I've got that in there holding my slide guide in place and now I'm going to drill my second hole. You can pull that out and then you can see we've got our two nice holes ready to go. One thing you want to check is on the back side after you've drilled these holes, there might be some burrs. It's important to try to knock those off.","source":"reviewed-transcript"},{"start":402.94,"text":"You can do it with a file, maybe take your bit from the opposite side and see if that'll knock them off, some sandpaper, whatever works for you. We've drilled the holes now in our tab and we can now move on to the next step. I'm going to move on to the 4 inch gate which is probably the most common gate people have and we already have our holes drilled here and the process is the same for every gate. The only things you'll find is once we move to a 7 inch gate we just use some more robust","source":"reviewed-transcript"},{"start":430.98,"text":"parts but the installation and process is exactly the same. Here again we've got our holes drilled in our tab and we've got our screws back in place and the body secured and things have been prepped and it's moving nice and free. We can see that. This body also has threaded holes going through the body. You're going to take the rod bracket and stick one of our screws through it and we're going to mount these to the underside and I'm going to send these screws all the way through and","source":"reviewed-transcript"},{"start":476.74,"text":"pretty much I'd call it hand tight. You don't want to crank down 100% of the way but 80% of the way, make sure that they're rigid as they've installed because we're going to move them just a little bit as we proceed to the next steps. We've got the first rod bracket so these things can move. In this installation with the threaded inserts I'm going to take my rod and I'm going to stick it through and what this does is this now aligns the two rod brackets so they're","source":"reviewed-transcript"},{"start":522.29,"text":"in line with each other and what you can do, I'll do it this way, is I'm going to slide it all the way this way and tighten that back one down all the way. In this gate I can actually push this rod back it through. If it doesn't work for you on some other model gates meaning that this butts into the collar of the gate body then you can, right now I would just tighten this down but if you can't push it through then just know that you've had this thing more or less secure, it's not","source":"reviewed-transcript"},{"start":555.74,"text":"super loose but you can take this out and then tighten it down all the way. You'll be able to move these slightly when the time comes to put this in and put the set screws down. So you can see this is still fitting in no problem. Now I'm going to turn the gate over and you can see we have the mounting screws showing themselves there and we're just going to put the gate body onto it so it just should fit nice and easily especially on a gate body like this.","source":"reviewed-transcript"},{"start":591.57,"text":"You might find you have to do a slightly different order of operations if you're dealing with a loose bolt nut meaning that you might slide the bottom nut and the body is still loose because the holes not threaded and it wasn't able to bring all this tight. So in that case it's a similar thing that you just will get your body on and get your nuts on the bolts there and then you can go through the same process of aligning your rod brackets here.","source":"reviewed-transcript"},{"start":627.93,"text":"So now we can tighten, I'm just going to use a pair of pliers, you can use a ratchet, a crescent wrench, whatever works for you and just give these guys a good tightening down and just like anything you don't want to go crazy tightening down. Our components are primarily made out of plastic here so you can damage them if you use all of your muscle or you know if you use a drill too much you could possibly break through and drive screws through the body, you don't want to do that.","source":"reviewed-transcript"},{"start":662.4,"text":"So we just make sure they're nice and snug, that's good, everything's still operating fine, we've got our gate body attached and now we're ready to go on to the next step and that's going to be putting on the tab bracket. We've got our holes drilled and we're going to slide the tab bracket on and what I'm going to do is I'm going to look at it and make sure I've got my holes aligned so when I come back to attach the next part I know that the screws are going to make it through to the hole there.","source":"reviewed-transcript"},{"start":705.32,"text":"So all we're doing is friction fitting the tab bracket onto the tab at this point. So the next step is we're going to take the slide bracket which has a connection bracket in the bearing arm, it should come assembled like this to you and we're just going to slide that over your rod and it should line up, there are grooves that line up and sort of interlock the two pieces together and again we're going to start by trying to get our two screws through the connection bracket into the tab bracket and through the tab and","source":"reviewed-transcript"},{"start":748.48,"text":"basically sandwiching all these pieces together and holding them snug. Take a drill or a screwdriver and I'm not going to do it super tight, I'm just going to get them in most of the way so it's holding in place, we'll worry about snugging them down at the very end. So those are in place now, now this is all connected and we can see things are still sliding smoothly but what we want to do is dial it in with these two screws and these two screws allow us to adjust the height, the small bits of height and our left to right.","source":"reviewed-transcript"},{"start":797.26,"text":"So next what I'm going to do is I'm going to make sure that the bearing arm is parallel to the gate body and the slide, we don't want this arm racked one way or the other. So I'm just going to visually look at it and make a small adjustment and sometimes you can tell I've got this just a little snug so it's not allowing me to move it very easily. I'm just going to loosen those two screws up that I just put in and it's going to allow","source":"reviewed-transcript"},{"start":835.36,"text":"me to move this up and down and create that parallelness that I need. So I'm just going to look at it and I think that looks good and now I'll tighten those two down and then the next step is the other two screws which is our left to right. The best way to do that is pull your gate out all the way and wiggle it left and right and you're going to see the difference as those screws slide in the slot of this connection bracket and go left","source":"reviewed-transcript"},{"start":869.8,"text":"and right and then pick the spot in the middle of that and secure those two screws down. And again I'm using a drill here but you can easily just do this by hand, make sure you don't use too much force driving these screws down into these components here. So now that we have all this and we're happy where this rod bracket is, on this particular model the rod bracket supplied is just the right length. Other models you might have a little extra","source":"reviewed-transcript"},{"start":900.24,"text":"that you might want to push back. So for example you might have a gate that sticks out a bit. You can leave it or you can push it back. I like to push it back to a spot that allows the bearing arm to open up all the way and I know visually that as I'm calibrating it once it reaches here I know it's open and I really don't have to worry about if I'm putting the arm under strain, if I'm going too far or something like that. So now that","source":"reviewed-transcript"},{"start":934.4,"text":"I have my bearing arm where I want it and everything's in alignment I'm going to tighten the two set screws on the back to make sure the rod is nice and secure. And again this is something you just want to snug up, you don't need to crank down on it and this guy is not going anywhere. So now we've got it sliding no problem and that's most of the installation of the gate control. The last thing we're going to do is attach the arm. Now before attaching the arm you want to have your gate installed and powered and all gates","source":"reviewed-transcript"},{"start":979.57,"text":"are going to be powered by the GRIT Power Bank. We also have, you're going to have a wire that plugs into your gate. We have a little green connector that goes into the gate here and what you're able to do is to daisy-chain, meaning going from one gate to the next with power. And you can see that the gate is lighting up now for the first time and before we can attach this arm you are going to bind your Gate Control device to your Hub. You can tell that the gate is flashing red and green; that is common of","source":"reviewed-transcript"},{"start":1023.3,"text":"any GRIT device. The LED will flash red and green when that device has not been bound to the system, and you'll need to do that before proceeding any further. If you don't know what binding is, look in the GRIT manual and it will tell you step by step how to do it. It's a very simple process. Now that you see your device is solid red—it could be green also—it's telling you that it is bound to the system and is ready to be calibrated.","source":"reviewed-transcript"},{"start":1051.73,"text":"So I'm going to go into the GRIT App, and if you go under Devices and under Gate, you will see a line that says Gate with a hyphen and then some miscellaneous letters and numbers. To determine whether that is your gate, you can press the Find icon on that line and it will flash red and green to let you know that you're approaching the right gate. When you first are on the system, you might have six, seven, or more gates on a system and you want to know which one you're actually working on, and the initial populated names","source":"reviewed-transcript"},{"start":1090.03,"text":"are a little confusing because they're random letters and numbers. So now that I've found the gate that I want to work with I'm going to go into that while I'm in the app and then I can rename it and I'll just call this test gate. I'm going to calibrate it by pressing the calibrate button and I'm going to, it automatically moves to center but you can ensure it moves to center by just pressing the move to center button on the calibration page in the app and what that means is now you can move your gate into a position that's","source":"reviewed-transcript"},{"start":1134.27,"text":"more or less halfway open. So we're in the middle position, this is in the middle position and now we're ready to put our arm on. So we'll start by taking the top hat and flat off our tab here and I'm going to make sure that we're still more or less halfway open. Now I can take the gate arm, I'm going to put it over the post and try to connect it to the servo. Now the tines on the servo here are going to make you have to either open","source":"reviewed-transcript"},{"start":1175.7,"text":"or close the gate a little bit to get it to fall down and lock itself securely into place. So actually I just got it there, it still looks good, still in a middle position but if your gate actually has to move a little bit open or closed that's fine as long as you're more or less in that range while getting the arm on. And I can take our mounting screw put that on and tighten it by hand or be careful using a drill. We're just going to snug that","source":"reviewed-transcript"},{"start":1206.92,"text":"down and then we're going to put our hat washer back on along with some other filler washers. And when doing this because gates all differ a bit in terms of their tab height and slight variations you might find that you need to stack your hat washer and flats slightly different. That's why we give you a variety of different sizes. So if you need to stack a little bit more underneath so that this is riding a planer to the gate body and the slide you'll figure","source":"reviewed-transcript"},{"start":1243.14,"text":"that out as you do the install. So we've put our top nut on here and now everything here is secure. Next what we're going to do is while we're still in this calibration page we're going to send the gate to open. It just moved just a little bit and now we just keep pressing more open on the calibration page until it is in the final position that we want for being open. Now you can't press really fast on the button to make it move smoothly.","source":"reviewed-transcript"},{"start":1280.57,"text":"You have to be a little bit patient. Just tap it once, tap it again. You're going to go until you're open. Now if you're retrofitting and you have duct work on your gate already you're going to have to do it by looking at the gate and seeing if the arm is stressed. If I don't know exactly where open is and I'm not wanting to strain this before I give it power I can position it so that I know this slide arm is when it's in the right position","source":"reviewed-transcript"},{"start":1311.57,"text":"is right there versus if I had the rod out more like that you could do that but you might want to put a piece of tape on here or something and that will give you a visual indicator as to what the maximum open is versus keeping on hitting open and putting a lot of stress on the arm and servo which can damage the system. So we make sure that things are in the right position. The very end of this rod meets up with the bearing arm here so","source":"reviewed-transcript"},{"start":1343.3,"text":"I know even if I had duct work on here and I couldn't see the slide in here that I know this is my fully open position. So I'll power it back on and go back to my calibration. The gate calibration page has a power graph. While you open or close your gate you should see a spike in power meaning the actuator is working at that time and it's showing you the amperage draw. At a resting state if you keep seeing spikes that means that the system","source":"reviewed-transcript"},{"start":1381.34,"text":"is under stress and you need to back off your open or your close to prevent your servo from burning out. So in this case I feel that I've gotten the right open position. Now I'm going to hit close and we're not closed all the way so I'll just keep hitting closed just little by little, a little patience. And as you're doing this you know you just keep looking at it and see when it stops wanting to slide in. And there it felt like I could hear it.","source":"reviewed-transcript"},{"start":1429.92,"text":"There's all sorts of indicators that you'll find depending on your scenario. And because I felt like that last one I put in it felt like it really pushed it in there. I'm going to back it off one just to make sure I'm not putting a lot of strain on the motor here. So now I can open, close, open, close. I'll do that a few times to make sure everything is operating nice and smoothly and that seems to be the case. So the key points to take","source":"reviewed-transcript"},{"start":1461.91,"text":"away from the installation of the gate actuator and the gate arm is to start with prepping your gate. Make sure that it's operating smoothly. Do some sanding, take it apart. If you can put some silicone lubricant or perhaps some graphite, something like that that helps enhance the sliding of the slide here. That's a major point. Your installation of the gate body, you'll have two different scenarios. One you have a threaded body and the other you don't and they'll just be a slight variation in how you connect it. But the major thing is","source":"reviewed-transcript"},{"start":1498.17,"text":"do not attach your gate arm until you've bound your gate actuator to the system and then you go through the calibration process. It's extremely important and that will prevent any damage to your system. I'm Marco Unieto with GRIT Automation. Thank you for watching and have a great day.","source":"reviewed-transcript"}]},{"slug":"gate-calibration","category":"tutorials","title":"GRIT Gate Calibration","description":"Complete guide to calibrating your GRIT automated blast gates for accurate open/close positioning.","tags":["gate","calibration","setup","blast gate","servo","positioning","adjustment"],"takeaways":["Confirm the Gate Control is bound to the GRIT Hub before beginning calibration.","Adjust open and closed positions in small increments while watching the arm and the power graph for signs of stress.","Back the setting off if the arm bends, power remains elevated, or a gate stop begins to bind."],"chapters":[{"start":1,"title":"Confirm the Gate Control is bound"},{"start":16,"title":"Find the correct gate in the device list"},{"start":64,"title":"Open the calibration controls"},{"start":89,"title":"Set the open position"},{"start":176,"title":"Back off an overstressed position"},{"start":191,"title":"Set the closed position"},{"start":238,"title":"Check gate stops and binding"},{"start":300,"title":"Run a final open-close test"}],"passages":[{"start":1.33,"text":"So here you can see that the light is solid green on the device and This means that it is bound to the hub and now we have control over this gate Which means it's time to calibrate the gate What you'll do is go into your devices and in this case we're going to go under the gate devices and look for our gate that we want and one thing to note is that on your list of Gates when you first bind them, you might have a half dozen a dozen or so gates But you'll have all these random numbers and letters","source":"reviewed-transcript"},{"start":40.41,"text":"Describing each gate and you don't really know which one is which to find the gate you want to calibrate There's a little magnifying glass Next to each one and if you keep pressing them eventually It will flicker and that way you know what gate you're working with so now that I know which gate I'm on I'm going to go into that gate and I'm going to calibrate it and I'm going to go into the calibration menu What it brings up is an open and close button So if I hit open it's in the open position I hit close","source":"reviewed-transcript"},{"start":75.97,"text":"It's in the closed position and you can see that it's not throwing very far and we do that on purpose So we don't damage the servo because gates of different sizes have different throws and this way we control What's happening? so I'm going to simply go to the more open button and That's going to take it to its most extreme more open that's set right now If I keep pressing that button, it will move in small increments and you just keep pressing it Until the gate is in the open position in the most open position that you'd want","source":"reviewed-transcript"},{"start":111.77,"text":"things to consider as you're doing this is You can over calibrate or over open or close the gate and put it into a stressed mode and A way you can tell that is through a couple means One is just physically looking at the gate and if you're noticing as I was doing this I went to way more open and what I want you to look at is this arm and I'm going to just keep going more open and you're going to see that slide's going to stop opening","source":"reviewed-transcript"},{"start":146.13,"text":"But this is going to start to bend a little bit and you'll be able to see that stress and we don't want that Now while it's in this overstressed position you can also look at the graph of power that the calibration menu has and It will show that the power is Spiking meaning that it's in a stressed position So it's another way for you to tell that you have this too far open or closed So I'm gonna back this off and I'm gonna keep backing it off until I see It in a more relaxed neutral position, which it is now","source":"reviewed-transcript"},{"start":188.81,"text":"So I've calibrated this all the way open now I'm gonna hit close and I'm gonna do the same thing keep hitting more closed Until I reach that point that is closed enough and As we just said you're gonna keep going until you feel that there's a stressed position or that you just know it's closed enough and Because I don't have this hooked up to pipe I can see the inside of the gate and I can visually just tell Where's a good spot which is right there? So now I can just hit open hit closed open","source":"reviewed-transcript"},{"start":230.77,"text":"Close and everything seems to be working smooth. I'm not overstressing the arm or the actuator causing damage now a couple little details you want to think about are Some gates have stops for example this gate we can see that there is a nub right here and oftentimes if you Close it or open it too much This nub can get wedged in the top or bottom of your gate and causing it to feel like it's binding and you might feel Like something's wrong. Keep in mind that that could happen. So as","source":"reviewed-transcript"},{"start":270.89,"text":"You've closed your gate or opened it if it feels like it's sticking Realize that you might have closed it a little too much and that that nub might be binding in there All gates do not have that For example gates like this just have a pass-through and they stop themselves So you wouldn't have that type of scenario happening with a gate like this But many gates do have the stop nub that can cause some problems and something to be aware of To make sure you're happy with it","source":"reviewed-transcript"},{"start":302.65,"text":"That's sounding good to me. It's smooth. It's closing and opening all the way. We've got a winner here and That's all there's to it","source":"reviewed-transcript"}]},{"slug":"magswitch-install-laguna","category":"tutorials","title":"MagSwitch Installation — Laguna Dust Collector","description":"Step-by-step MagSwitch installation specifically for Laguna brand dust collectors.","tags":["magswitch","installation","laguna","dust collector","wiring","specific model"],"takeaways":["Disconnect power before opening the Laguna dust collector's contactor enclosure.","Install the current transformer on a motor lead and connect the two-wire harness to incoming mains power.","Wire the four-wire harness to the start and stop terminals, then connect and secure the MagSwitch Collector."],"chapters":[{"start":0,"title":"Installation overview and power-off step"},{"start":20,"title":"Identify the three harness components"},{"start":51,"title":"Install the current transformer"},{"start":95,"title":"Connect device power"},{"start":111,"title":"Wire the start and stop controls"},{"start":211,"title":"Connect the MagSwitch and replace the lid"}],"passages":[{"start":0,"text":"We're going to walk through what it looks like to install the GRIT MagSwitch Collector device on a Laguna dust collector. Let's check it out.","source":"reviewed-transcript"},{"start":13.6,"text":"First things first, we should kill the power. There are three parts that need to be installed when you're putting in a MagSwitch Collector.","source":"reviewed-transcript"},{"start":20.4,"text":"First part is the two cable connector that goes to your power, so that's going to run to the two lines of your AC.","source":"reviewed-transcript"},{"start":27.2,"text":"And then we have the current transformer or the little donut.","source":"reviewed-transcript"},{"start":31.08,"text":"And then the third item is the connector with four wires.","source":"reviewed-transcript"},{"start":35.96,"text":"After that we're going to unscrew slightly on the bottom that holds the lid on.","source":"reviewed-transcript"},{"start":42.14,"text":"And I found that using some tape on the lid helps setting things up.","source":"reviewed-transcript"},{"start":51.2,"text":"First thing we can do is we're going to put in the current transformer.","source":"reviewed-transcript"},{"start":62.14,"text":"That's the little donut shaped guy.","source":"reviewed-transcript"},{"start":65.44,"text":"On the wire that runs to the motor of your dust collector which is going to be on the","source":"reviewed-transcript"},{"start":70.42,"text":"bottom side of your contactor. Unscrew one of those legs and screw it back in.","source":"reviewed-transcript"},{"start":83.44,"text":"This allows GRIT to know when the dust collector is actually running and","source":"reviewed-transcript"},{"start":88.36,"text":"measure the current that's being drawn. The next part we want to do is connect","source":"reviewed-transcript"},{"start":95.04,"text":"the power wires. This is the two wire connector. This goes to the legs on the","source":"reviewed-transcript"},{"start":101.46,"text":"top side of the contactor that are coming from the wall, the mains power. This is","source":"reviewed-transcript"},{"start":105.38,"text":"to then give power to the actual GRIT MagSwitch device.","source":"reviewed-transcript"},{"start":111.38,"text":"Next we'll tackle the last of the wire harnesses. That's the wire harness that","source":"reviewed-transcript"},{"start":115.56,"text":"has four wires. It's got a blue, a red, a green, and a black. There's two switches.","source":"reviewed-transcript"},{"start":120.48,"text":"There's one that you push to turn it on and there's one that you would push to","source":"reviewed-transcript"},{"start":124.1,"text":"then turn it off. The one that you use to turn it on is this top one here and it","source":"reviewed-transcript"},{"start":128.96,"text":"has it's marked with normally open and there's a terminal of three and a terminal","source":"reviewed-transcript"},{"start":134.6,"text":"four. For the terminal three we are going to unscrew and plug in the red wire.","source":"reviewed-transcript"},{"start":144.82,"text":"Next we're going to take the blue wire and plug it into the other side terminal 4.","source":"reviewed-transcript"},{"start":158.32,"text":"We're going to take the black wire out of terminal 3 and we want to twist that together","source":"reviewed-transcript"},{"start":174.42,"text":"with the GRIT black wire","source":"reviewed-transcript"},{"start":184.7,"text":"and put on a wire nut.","source":"reviewed-transcript"},{"start":189.42,"text":"And finally, we plug the green wire","source":"reviewed-transcript"},{"start":193.14,"text":"into terminal 3","source":"reviewed-transcript"},{"start":195.86,"text":"of this off switch.","source":"reviewed-transcript"},{"start":204.42,"text":"Replace any wires that you had taken off.","source":"reviewed-transcript"},{"start":211.42,"text":"Next, grab the MagSwitch Collector device and plug in each of the connectors.","source":"reviewed-transcript"},{"start":232.92,"text":"If there's room within the box, you can go ahead and leave this unit inside.","source":"reviewed-transcript"},{"start":238.02,"text":"If there's not, sometimes you have to drill a little hole on the side and run","source":"reviewed-transcript"},{"start":241.7,"text":"the wires through. And that's it.","source":"reviewed-transcript"},{"start":245.28,"text":"Take the tape off and replace the lid.","source":"reviewed-transcript"},{"start":254.6,"text":"And that's how you install the GRIT MagSwitch Collector device in a Laguna","source":"reviewed-transcript"},{"start":257.94,"text":"dust collector.","source":"reviewed-transcript"},{"start":262.92,"text":"Thank you.","source":"reviewed-transcript"}]},{"slug":"ivac-gate-control","category":"tutorials","title":"GRIT iVac Gate Control","description":"Setup and configuration guide for using GRIT with iVac automated blast gates.","tags":["ivac","gate control","automated","blast gate","setup","configuration"],"takeaways":["Existing iVac blast gates can remain in place when a shop adds GRIT automation.","The GRIT iVac Gate Control connects between the existing iVac power supply and gate control input.","The retrofit keeps prior gate hardware in service instead of requiring a rip-and-replace installation."],"chapters":[{"start":2,"title":"Keep existing iVac gates in service"},{"start":29,"title":"The GRIT iVac Gate Control"},{"start":37,"title":"Connect power and control wiring"},{"start":71,"title":"Mount the control and finish the retrofit"}],"passages":[{"start":2,"text":"Hi everyone, my name is Marco Unieto with GRIT Automation. Today I want to show you the GRIT iVac Gate Control. Many shops already have iVac gates installed and want to keep that investment as part of the shop. The GRIT iVac Gate Control lets the GRIT system operate those existing gates without requiring them to be replaced. It's a really simple process. All you're gonna do is take the power supply that came with your iVac gate and you're gonna plug that into the input","source":"reviewed-transcript"},{"start":48.22,"text":"and we've got a little jumper cable that jumps out and will supply power to the iVac gate and you'll use a control wire to plug in and this goes into the control input for the GRIT iVac control device and you can use some VHB tape and just stick this to your iVac system so it's that simple. Takes all of 20 seconds to hook this up and you're off to the races.","source":"reviewed-transcript"}]},{"slug":"remote-control-programming","category":"tutorials","title":"Remote Control Programming","description":"How to program and configure GRIT remote controls for manual override of your automated system.","tags":["remote control","programming","keyfob","manual override","rf","wireless"],"takeaways":["GRIT supports both infrared and radio-frequency remotes used by dust collectors and air filters.","Choose a preset when available; otherwise use Custom and teach the Hub each required command.","Test captured RF commands and save the working command before repeating the process for speed control."],"chapters":[{"start":0,"title":"IR and RF remote types"},{"start":32,"title":"Choose a preset or Custom"},{"start":68,"title":"Learn and test IR commands"},{"start":133,"title":"Why power-off may replace the remote off command"},{"start":157,"title":"Learn, test, and save RF commands"}],"passages":[{"start":0,"text":"There are two different types of devices that use the infrared or radio frequency RF type of remote controls to control those devices.","source":"reviewed-transcript"},{"start":12,"text":"Dust collectors sometimes do and certain air filters sometimes do.","source":"reviewed-transcript"},{"start":17,"text":"We're going to look at how to program those devices and when GRIT already has a preset that can make setup even easier.","source":"reviewed-transcript"},{"start":26,"text":"here. How best to train your hub for new remotes for your devices. So an infrared","source":"reviewed-transcript"},{"start":32.54,"text":"remote typically has an LED in the front. We select IR remote and we are then","source":"reviewed-transcript"},{"start":44.48,"text":"presented with some extra settings. One of them controls the speed at which we","source":"reviewed-transcript"},{"start":50.12,"text":"want our air filter to run at. If the type of air filter you have is shown in","source":"reviewed-transcript"},{"start":55.58,"text":"this list then you can select it and everything will just work. If it's not","source":"reviewed-transcript"},{"start":60.22,"text":"then select custom and now we need to train it on the different settings of","source":"reviewed-transcript"},{"start":68.12,"text":"that remote. So let's start with the on command. We will hit learn and we're","source":"reviewed-transcript"},{"start":77.82,"text":"presented with a pop-up. We then come to the side of the hub with the holes and","source":"reviewed-transcript"},{"start":83.54,"text":"push our remote button and when it gets it and it learns it the modal will go","source":"reviewed-transcript"},{"start":91.14,"text":"away and we're then shown it says clear or test. Clicking the test button will","source":"reviewed-transcript"},{"start":98.06,"text":"send that command to the device via the IR blaster. IR blaster needs to be","source":"reviewed-transcript"},{"start":108.4,"text":"plugged into the bottom of the air quality device from GRIT and the emitting eye needs to be placed","source":"reviewed-transcript"},{"start":116.96,"text":"in front of the receiver on the air filter next we can train the speed command so click learn","source":"reviewed-transcript"},{"start":127.28,"text":"and click the speed button on your remote again pointing at the holes on the side of the hub","source":"reviewed-transcript"},{"start":132.88,"text":"and it learns it. I typically don't train the off command but instead GRIT will remove power","source":"reviewed-transcript"},{"start":141.86,"text":"to the air filter via an internal relay instead of using the remote's off command. This helps","source":"reviewed-transcript"},{"start":148.88,"text":"ensure that the air filter is in the correct state when adjusting on off and speed commands.","source":"reviewed-transcript"},{"start":156.62,"text":"Next, we can train it on the RF if that's the type of remote we have.","source":"reviewed-transcript"},{"start":163.46,"text":"So we can click over to RF remote and grab an RF remote.","source":"reviewed-transcript"},{"start":170.5,"text":"Now, RF remotes, the antenna of where to place the new RF remote is different.","source":"reviewed-transcript"},{"start":178.98,"text":"It's not over here, but instead, it's directly on top of the buttons.","source":"reviewed-transcript"},{"start":183.76,"text":"So let's click the learn button and we're going to be learning the on command.","source":"reviewed-transcript"},{"start":195.66,"text":"And so you press the button and now we're presented with a screen that shows the different","source":"reviewed-transcript"},{"start":202.78,"text":"commands that GRIT heard.","source":"reviewed-transcript"},{"start":207.28,"text":"And we can test these commands by clicking the test button.","source":"reviewed-transcript"},{"start":214.1,"text":"And when we find the one that works correctly, we can hit the save button.","source":"reviewed-transcript"},{"start":222.78,"text":"Now GRIT has learned the RF command for on for this particular remote.","source":"reviewed-transcript"},{"start":229.88,"text":"The same goes for the speed command exactly like we did last time.","source":"reviewed-transcript"},{"start":233.9,"text":"We place the remote over the buttons.","source":"reviewed-transcript"},{"start":239.58,"text":"We can test the different commands that it heard during that learning session and click","source":"reviewed-transcript"},{"start":247.48,"text":"save.","source":"reviewed-transcript"},{"start":248.48,"text":"And we're done.","source":"reviewed-transcript"}]},{"slug":"gate-power","category":"tutorials","title":"GRIT Gate Power","description":"Understanding power requirements and wiring for GRIT automated blast gates.","tags":["gate power","wiring","power supply","voltage","blast gate","electrical"],"takeaways":["Match red to positive and white to negative when wiring the Gate Control connector.","Daisy-chain Gate Controls to reduce the number of home runs to the Power Bank.","For intermittent power, check wire seating, connector engagement, and strain caused by insufficient slack."],"chapters":[{"start":0,"title":"Prepare the Gate Control connector"},{"start":38,"title":"Insert and secure the power wires"},{"start":83,"title":"Plug in the actuator and daisy-chain gates"},{"start":165,"title":"Troubleshoot an unpowered or intermittent gate"},{"start":205,"title":"Connect the system to the Power Bank"}],"passages":[{"start":0,"text":"Now that we have the gate control and slide guide installed to our metal blast gate, it's time to power the actuator.","source":"reviewed-transcript"},{"start":10,"text":"And all of your actuators are going to come with a green connector, no matter what size, and this is what you're going to connect your wires to.","source":"reviewed-transcript"},{"start":17,"text":"And we'll start off by noticing that we have a negative and a positive labeled on the green connector to ensure that we're connecting the wires into the right place.","source":"reviewed-transcript"},{"start":28,"text":"If you notice, we have two screws that will loosen up the openings for us to stick the wires in.","source":"reviewed-transcript"},{"start":35,"text":"And what I'm going to do is I'm just going to turn those counterclockwise and loosen them up all the way.","source":"reviewed-transcript"},{"start":40,"text":"What you'll notice is on the inside of the green connector, there's a bar that moves up and down and opens up for us to insert the wires into.","source":"reviewed-transcript"},{"start":50,"text":"So now that I have this open, I'm going to grab my first set of wires.","source":"reviewed-transcript"},{"start":55,"text":"I'm going to make sure that my red goes into positive and white into negative.","source":"reviewed-transcript"},{"start":60.5,"text":"Then I'm going to grab a second set.","source":"reviewed-transcript"},{"start":63.66,"text":"This is because the GRIT system allows you to daisy chain your power from one gate to","source":"reviewed-transcript"},{"start":70.36,"text":"the next.","source":"reviewed-transcript"},{"start":71.94,"text":"I have both wires in and I'm going to tighten the screws nice and tight.","source":"reviewed-transcript"},{"start":78.68,"text":"Those bars should have clamped down onto the screws.","source":"reviewed-transcript"},{"start":81.5,"text":"I give it a good pull.","source":"reviewed-transcript"},{"start":83.46,"text":"I make sure that it's secure in there.","source":"reviewed-transcript"},{"start":86.36,"text":"And that's all you have to do to get the wires","source":"reviewed-transcript"},{"start":90.08,"text":"into the connector.","source":"reviewed-transcript"},{"start":91.26,"text":"And you'll take this now,","source":"reviewed-transcript"},{"start":93.34,"text":"and it will just plug right into your actuator.","source":"reviewed-transcript"},{"start":97.22,"text":"So you can see here,","source":"reviewed-transcript"},{"start":98.58,"text":"we have our metal blast gates installed,","source":"reviewed-transcript"},{"start":101.48,"text":"our actuator and slide guides all installed,","source":"reviewed-transcript"},{"start":104.6,"text":"and we've wired everything.","source":"reviewed-transcript"},{"start":106.54,"text":"And I'd like to point out that we have our gates daisy chain.","source":"reviewed-transcript"},{"start":110.92,"text":"So I've just come into one green connector with the supply","source":"reviewed-transcript"},{"start":114.98,"text":"and then kept it going through,","source":"reviewed-transcript"},{"start":116.58,"text":"bounced over to the next and the next.","source":"reviewed-transcript"},{"start":118.76,"text":"And this has just created a much easier,","source":"reviewed-transcript"},{"start":121.16,"text":"cleaner installation method.","source":"reviewed-transcript"},{"start":123.02,"text":"So I only have one home run going to my power supply","source":"reviewed-transcript"},{"start":126.98,"text":"and these just daisy chain from one to the next.","source":"reviewed-transcript"},{"start":129.96,"text":"Things to consider if you run into any problems","source":"reviewed-transcript"},{"start":132.52,"text":"while doing this, for example,","source":"reviewed-transcript"},{"start":134.74,"text":"if you have one gate that's not on, check your connection.","source":"reviewed-transcript"},{"start":139.44,"text":"It could be a variety of reasons.","source":"reviewed-transcript"},{"start":141.1,"text":"One, it could be your wires aren't seated correctly","source":"reviewed-transcript"},{"start":144.82,"text":"into the green connector.","source":"reviewed-transcript"},{"start":146.56,"text":"It could also be you don't have it pushed in all the way.","source":"reviewed-transcript"},{"start":150.34,"text":"Or sometimes people don't leave enough slack on their wire","source":"reviewed-transcript"},{"start":154,"text":"and the tension on the wire can cause the green connector","source":"reviewed-transcript"},{"start":157.5,"text":"to flicker a bit and it's intermittent","source":"reviewed-transcript"},{"start":160.46,"text":"in terms of the light coming on on the device.","source":"reviewed-transcript"},{"start":163.82,"text":"After you've wired up all of your gate controls,","source":"reviewed-transcript"},{"start":167.74,"text":"you have one last hookup at your power bank to energize all of the gate controls.","source":"reviewed-transcript"},{"start":174.18,"text":"And here we have what plugs into your power bank.","source":"reviewed-transcript"},{"start":178.6,"text":"And it has a red and a black button to release the opening.","source":"reviewed-transcript"},{"start":185.04,"text":"And in this case, I can press both of them at the same time.","source":"reviewed-transcript"},{"start":188.98,"text":"And I make sure that my red's going into red and the other wire is going into negative.","source":"reviewed-transcript"},{"start":193.84,"text":"I pull on them a little bit to make sure they're secure.","source":"reviewed-transcript"},{"start":196.14,"text":"and this now would plug into the power bank","source":"reviewed-transcript"},{"start":200.86,"text":"and energize the whole system.","source":"reviewed-transcript"},{"start":203.32,"text":"You can, just like in daisy chaining,","source":"reviewed-transcript"},{"start":205.56,"text":"you can put two sets of wires in here","source":"reviewed-transcript"},{"start":207.7,"text":"if you have different directions to go.","source":"reviewed-transcript"},{"start":209.58,"text":"Our power bank actually has two outputs,","source":"reviewed-transcript"},{"start":212.84,"text":"so this could give you four different directions to go","source":"reviewed-transcript"},{"start":216.6,"text":"if you truly need that.","source":"reviewed-transcript"},{"start":218.08,"text":"But remember that you can daisy chain all of your gates,","source":"reviewed-transcript"},{"start":221.36,"text":"and this makes for a much cleaner, easier installation.","source":"reviewed-transcript"}]},{"slug":"troubleshoot-app-wont-load","category":"troubleshooting","title":"Troubleshooting: GRIT App Won't Load","description":"Quick fixes for when the GRIT App isn't loading properly on your phone or tablet.","tags":["troubleshooting","app","won't load","phone","tablet","mobile","grit app","fix"],"takeaways":["A blank GRIT app screen can result from the phone and Hub being on different Wi-Fi networks.","If the Hub's IP address changed, delete and recreate the home-screen shortcut from the Hub QR code.","Reserve a static IP address for the Hub in the router to prevent repeat shortcut failures."],"chapters":[{"start":0,"title":"Diagnose a blank app screen"},{"start":15,"title":"Check the phone and Hub Wi-Fi"},{"start":30,"title":"Recreate the QR-code shortcut"},{"start":47,"title":"Reserve the Hub IP address"}],"passages":[{"start":0,"text":"So if you're in a shop and you try to bring up the app using your phone or your tablet","source":"reviewed-transcript"},{"start":6.04,"text":"and you click on the button on the home screen and then you're just presented with this white","source":"reviewed-transcript"},{"start":10.2,"text":"screen on your phone and nothing loads, what should I do?","source":"reviewed-transcript"},{"start":13.76,"text":"The issue could be one of a few things, so let's walk through what those could be.","source":"reviewed-transcript"},{"start":17.52,"text":"First it could be that did you connect your hub to your local Wi-Fi network?","source":"reviewed-transcript"},{"start":22.56,"text":"If you did, make sure your phone is also on that Wi-Fi network.","source":"reviewed-transcript"},{"start":26.96,"text":"If you created your shortcut on your phone when you were connected to a different network","source":"reviewed-transcript"},{"start":33.08,"text":"with the hub, that means the IP address has changed.","source":"reviewed-transcript"},{"start":36.8,"text":"So you'll want to go back through, delete the home screen icon, and then recreate it","source":"reviewed-transcript"},{"start":42.26,"text":"by taking a scan of the QR code on the side of the hub.","source":"reviewed-transcript"},{"start":46.08,"text":"If the IP address of your hub continuously changes, the best thing to do is to go into","source":"reviewed-transcript"},{"start":51.92,"text":"your local router and set a reserved or static IP address for the hub. This will","source":"reviewed-transcript"},{"start":60.42,"text":"make it so that it doesn't change ever again.","source":"reviewed-transcript"}]},{"slug":"troubleshoot-collector-missing-commands","category":"troubleshooting","title":"Troubleshooting: Dust Collector Missing Commands","description":"What to do when your dust collector isn't responding to commands from the iR/RF Collector module.","tags":["troubleshooting","dust collector","missing commands","ir","rf","collector","signal","fix"],"takeaways":["The iR/RF Collector reproduces the commands from the dust collector's remote.","Move the module closer to the dust collector when on/off commands are intermittent.","Relearn the remote commands in the GRIT app if repositioning does not resolve the issue."],"chapters":[{"start":0,"title":"How the iR/RF Collector sends commands"},{"start":10,"title":"Move the module closer"},{"start":21,"title":"Reprogram commands in the GRIT app"}],"passages":[{"start":0,"text":"The iR/RF Collector device mimics the remote commands that come with the remote for your collector.","source":"reviewed-transcript"},{"start":10,"text":"If the commands to turn it on and off are spotty, first thing to do is to move that module closer to the dust collector.","source":"reviewed-transcript"},{"start":20,"text":"If that doesn't work, then the next step is to reprogram those remote commands within the GRIT app.","source":"reviewed-transcript"},{"start":29,"text":"S 상ATION","source":"reviewed-transcript"}]},{"slug":"troubleshoot-hub-network-reset","category":"troubleshooting","title":"Troubleshooting: Hub Network Reset","description":"How to reset your GRIT Hub's network settings when you need to reconnect or change WiFi networks.","tags":["troubleshooting","hub","network","reset","wifi","connection","settings","fix"],"takeaways":["Hold the GRIT Hub side button for a full 20 seconds to clear incorrect Wi-Fi settings.","Allow about one minute for the Hub to restart and broadcast its setup Wi-Fi network.","Reconnect to the GRIT Hub Wi-Fi and repeat the local-network setup with the correct password."],"chapters":[{"start":0,"title":"When a network reset is needed"},{"start":10,"title":"Hold the side button for 20 seconds"},{"start":25,"title":"Reconnect to the Hub setup network"}],"passages":[{"start":0,"text":"If you are trying to set up the GRIT Hub to connect to a local Wi-Fi and the Wi-Fi password","source":"reviewed-transcript"},{"start":10.52,"text":"might not have got put in the right way, the way you fix that is you hold the side button","source":"reviewed-transcript"},{"start":15.68,"text":"on the Hub for 20 seconds, a full 20 seconds.","source":"reviewed-transcript"},{"start":18.9,"text":"Make sure you count 1-1000 and this will reset the network settings.","source":"reviewed-transcript"},{"start":24.16,"text":"The Hub's initial boot, when it creates its own Wi-Fi network, usually takes about a minute.","source":"reviewed-transcript"},{"start":30,"text":"It will then broadcast the GRIT Hub Wi-Fi again.","source":"reviewed-transcript"},{"start":34,"text":"You can connect to that and then you can again try to move it to your local network.","source":"reviewed-transcript"}]}]}GRIT at Home videos
Home-shop product guides, dust-collection setup, installation, and troubleshooting. Search by the problem you are trying to solve.
18 videos
7:42
Dust management
See how GRIT's full dust management ecosystem works in a real home woodworking shop — automated gates, triggers, and monitoring in action.
Watch video and read transcript →
1:32
Dust management
Learn how GRIT monitors air quality in your shop, tracking particulate levels and alerting you when conditions change.
Watch video and read transcript →
2:45
Dust management
Quick guide to choosing the right GRIT products for your automated dust collection setup — from gates to triggers to the Hub.
Watch video and read transcript →
1:16
Tutorials & FAQs
Common questions answered about whether GRIT's automated dust collection system is a good fit for home woodworking shops.
Watch video and read transcript →
1:52
Tutorials & FAQs
Introduction to GRIT Switch — learn what it does, how it works, and where it fits in your automation setup.
Watch video and read transcript →
2:28
Tutorials & FAQs
Find out which blast gate brands and models work with GRIT Gate Control for automated dust collection.
Watch video and read transcript →
3:19
Tutorials & FAQs
Step-by-step walkthrough for configuring GRIT Trigger current sensors to automatically detect when tools are running.
Watch video and read transcript →
0:54
Tutorials & FAQs
Not sure where to begin with GRIT? This quick guide helps you identify the right starting point for your shop.
Watch video and read transcript →
4:54
Tutorials & FAQs
How to install GRIT MagSwitch on dust collectors that use a magnetic contactor for motor control.
Watch video and read transcript →
25:19
Tutorials & FAQs
Complete installation guide for GRIT automated blast gate controls — mounting, wiring, and initial setup.
Watch video and read transcript →
5:14
Tutorials & FAQs
Complete guide to calibrating your GRIT automated blast gates for accurate open/close positioning.
Watch video and read transcript →
4:24
Tutorials & FAQs
Step-by-step MagSwitch installation specifically for Laguna brand dust collectors.
Watch video and read transcript →
1:31
Tutorials & FAQs
Setup and configuration guide for using GRIT with iVac automated blast gates.
Watch video and read transcript →
4:15
Tutorials & FAQs
How to program and configure GRIT remote controls for manual override of your automated system.
Watch video and read transcript →
3:51
Tutorials & FAQs
Understanding power requirements and wiring for GRIT automated blast gates.
Watch video and read transcript →
1:05
Troubleshooting
Quick fixes for when the GRIT App isn't loading properly on your phone or tablet.
Watch video and read transcript →
0:34
Troubleshooting
What to do when your dust collector isn't responding to commands from the iR/RF Collector module.
Watch video and read transcript →
0:43
Troubleshooting
How to reset your GRIT Hub's network settings when you need to reconnect or change WiFi networks.
Watch video and read transcript →
No Home-shop videos match that search. Try a product name, installation task, or symptom.
{"version":1,"genericTerms":["gate","grit","product","shop","system","tool","video"],"stopWords":["a","an","and","are","can","do","does","for","how","i","in","is","it","my","of","on","the","this","to","what","where","why","with"],"concepts":[{"phrases":["gate","blast gate","gate control"]},{"phrases":["dust collector","collector"]},{"phrases":["wifi","wi fi","wireless","network connection"]},{"phrases":["wont close","will not close","does not close","not closing","binding","sticking","stuck","jammed"]},{"phrases":["wont open","will not open","does not open","not opening"]},{"phrases":["wont load","will not load","does not load","not loading"]},{"phrases":["not working","wont work","will not work","does not work","doesnt work","not responding","isnt responding","does not respond","doesnt respond","missing commands"]},{"phrases":["wont connect","will not connect","does not connect","doesnt connect","not connecting","reconnect","network reset","reset network"]},{"phrases":["setup","configure","configuration","program","programming"]},{"phrases":["install","installation","mount","mounting"]},{"phrases":["calibrate","calibration","calibrating"]}],"documents":[{"slug":"grit-home-woodshop","category":"dust-management","title":"GRIT in your Home Woodshop","description":"See how GRIT's full dust management ecosystem works in a real home woodworking shop — automated gates, triggers, and monitoring in action.","tags":["home","woodshop","woodworking","dust collection","workshop","demo","overview","hobby","setup","walkthrough","marco","getting started","installation","tutorial"],"takeaways":["A GRIT home-shop system starts with the Hub and adds a Trigger to each controlled tool.","Collector devices and retrofit Gate Controls automate dust collection as tools are used.","Optional dust-bin and air-quality sensors add fill-level and filtration automation."],"chapters":[{"start":0,"title":"GRIT for shops of any size"},{"start":42,"title":"Install the GRIT Hub"},{"start":126,"title":"Add Triggers to tools"},{"start":184,"title":"Choose a Collector device"},{"start":216,"title":"Retrofit Gate Controls"},{"start":278,"title":"Automatic tool and gate demonstration"},{"start":342,"title":"Add a dust-bin sensor"},{"start":372,"title":"Automate air filtration"}],"passages":[{"start":0,"text":"Hi, my name is Mark Agneto with GRIT Automation and today we wanted to show and explain how you can implement the GRIT Automation system into your home shop.","source":"reviewed-transcript"},{"start":16,"text":"So whether it's large or small, GRIT has devices to satisfy any tool that's out there.","source":"reviewed-transcript"},{"start":21,"text":"there. Many of our customers sometimes don't realize that the GRIT Automation","source":"reviewed-transcript"},{"start":25.38,"text":"system can apply to a small personal shop, typically because they see it in","source":"reviewed-transcript"},{"start":29.7,"text":"large universities or larger shops and think that it might be too much for them.","source":"reviewed-transcript"},{"start":33.72,"text":"But we're here today to explain and show that GRIT is sized for any size shop,","source":"reviewed-transcript"},{"start":40.68,"text":"including your small home shop. So let's get started and we'll show you the types","source":"reviewed-transcript"},{"start":45.36,"text":"of devices you're going to need. To begin with, every GRIT system, no matter what,","source":"reviewed-transcript"},{"start":49.44,"text":"starts with the GRIT Hub and it's the brains of the operation. And you'll pick","source":"reviewed-transcript"},{"start":54.36,"text":"a spot centrally located in your shop to put it. So on the side of the hub there's","source":"reviewed-transcript"},{"start":59.82,"text":"a QR code that's generated when setting up your system for the first time. On the","source":"reviewed-transcript"},{"start":65.52,"text":"front of the hub you'll see three buttons. The lock, unlock, and bind button.","source":"reviewed-transcript"},{"start":70.44,"text":"When you come into your shop you can simply unlock your entire shop by the","source":"reviewed-transcript"},{"start":74.32,"text":"press of a button and the green light indicates that all of your tools are now","source":"reviewed-transcript"},{"start":79.18,"text":"accessible and ready for use. The bind button in the middle is when setting up your shop. It's what","source":"reviewed-transcript"},{"start":86.38,"text":"communicates and allows new devices into the GRIT system. Power and ethernet cable on the bottom.","source":"reviewed-transcript"},{"start":93.34,"text":"The GRIT Hub can be connected to your local network by either using an ethernet cable,","source":"reviewed-transcript"},{"start":99.34,"text":"and there's a jack on the bottom here, you can connect wirelessly to your network, or the GRIT","source":"reviewed-transcript"},{"start":105.74,"text":"hub can operate by itself without any internet connection and an antenna and","source":"reviewed-transcript"},{"start":111.92,"text":"programming eye and ventilation on the other side. Again every GRIT system","source":"reviewed-transcript"},{"start":116.24,"text":"starts with the GRIT Hub it is the brains of the operation and it's going","source":"reviewed-transcript"},{"start":120.02,"text":"to communicate with every other device that is part of your home shop system.","source":"reviewed-transcript"},{"start":124.22,"text":"After the GRIT Hub you're gonna add a trigger to every tool in your shop. GRIT","source":"reviewed-transcript"},{"start":129.96,"text":"offers an entire spectrum of triggers ranging from 120 volts all the way up to","source":"reviewed-transcript"},{"start":135.12,"text":"480-volt three-phase. The GRIT Trigger monitors power and can tell whether your tool is on or not. The LED","source":"reviewed-transcript"},{"start":142.96,"text":"indicator light on top of each trigger will illuminate red or green showing whether the","source":"reviewed-transcript"},{"start":149.2,"text":"tool is locked or unlocked. And this is what enables GRIT to automate your dust collector.","source":"reviewed-transcript"},{"start":156,"text":"The GRIT Trigger also allows for locking and unlocking the tool in your shop.","source":"reviewed-transcript"},{"start":160.56,"text":"This is done simply by pressing a button on the hub or in the GRIT app. After putting triggers on","source":"reviewed-transcript"},{"start":167.88,"text":"each one of the tools in your shop, the next thing you'll want to do is add a collector device to","source":"reviewed-transcript"},{"start":172.62,"text":"your collection system. In this example, we have a 120-volt collector and we're just adding our","source":"reviewed-transcript"},{"start":179.34,"text":"device in line with the collector and it's as simple as plugging it in and it into the wall.","source":"reviewed-transcript"},{"start":186.96,"text":"GRIT offers 120-volt and 220-volt MagSwitch Collectors, an IR/RF collector device, which is","source":"reviewed-transcript"},{"start":196.44,"text":"if your collector has a remote, as well as a VFD device, your variable frequency drive. The next","source":"reviewed-transcript"},{"start":204.24,"text":"thing to add to your automated collection system is the GRIT Gate Control. The GRIT Gate Control","source":"reviewed-transcript"},{"start":210.12,"text":"retrofits onto your existing blast gate, so there's no need to take apart existing systems","source":"reviewed-transcript"},{"start":216.46,"text":"You add the GRIT Gate Control device to your existing metal blast gate.","source":"reviewed-transcript"},{"start":221.46,"text":"GRIT offers sizes from 2.5 inches all the way up to 12 inches.","source":"reviewed-transcript"},{"start":226.46,"text":"The GRIT Gate Control devices are powered with a 9-volt power supply.","source":"reviewed-transcript"},{"start":231.46,"text":"It's done easily by daisy-chaining all of your gates together to the one power supply instead of needing an outlet for each location.","source":"reviewed-transcript"},{"start":241.46,"text":"The GRIT Gate Control has a visual indicator of being red or green showing","source":"reviewed-transcript"},{"start":248,"text":"whether it's open or closed. Green being open, red being closed. Once you've","source":"reviewed-transcript"},{"start":253.64,"text":"installed the entire GRIT system in your shop and configured it with the GRIT app,","source":"reviewed-transcript"},{"start":257.54,"text":"you simply just use your tools in your shop and things are automated. I can come","source":"reviewed-transcript"},{"start":263.6,"text":"and use my spindle sander and my disc drum sander and my table saw and I don't","source":"reviewed-transcript"},{"start":270.14,"text":"to think about any configuration at this point. So I can show you that I'm going to turn on all","source":"reviewed-transcript"},{"start":274.86,"text":"three tools and the collector and the blast gates configure themselves automatically.","source":"reviewed-transcript"},{"start":283.02,"text":"I can even come to my table saw.","source":"reviewed-transcript"},{"start":287.42,"text":"And here we'll see that we actually have branch gates that are going to be responsive also.","source":"reviewed-transcript"},{"start":291.66,"text":"So I have all of these gates open and I can walk around and use whatever tool I need.","source":"reviewed-transcript"},{"start":308.4,"text":"So you can see that I've done nothing other than go up to my tools and use them.","source":"reviewed-transcript"},{"start":312.78,"text":"This leads into the design of your shop.","source":"reviewed-transcript"},{"start":315.8,"text":"You can do things differently than with a manual system.","source":"reviewed-transcript"},{"start":318.92,"text":"able to put blast gates in higher locations out of the way. The GRIT gate","source":"reviewed-transcript"},{"start":323.32,"text":"control system is highly adaptable to any shop. GRIT can do a variety of","source":"reviewed-transcript"},{"start":329.68,"text":"configurations. Something you can add on to your dust collection system is a dust","source":"reviewed-transcript"},{"start":334.82,"text":"bin sensor. Older systems typically don't have them, some of the newer ones do.","source":"reviewed-transcript"},{"start":339.14,"text":"Simply drill a hole in the top, insert the sensor, and tighten the nut on the","source":"reviewed-transcript"},{"start":346.88,"text":"underside. Also we have a red light that indicates whether your dustbin is full","source":"reviewed-transcript"},{"start":354.44,"text":"or not. It's important that after emptying your dustbin that you clean off","source":"reviewed-transcript"},{"start":360.26,"text":"the sensor to ensure you don't have false readings. GRIT also offers a way to","source":"reviewed-transcript"},{"start":367.7,"text":"automate your air filtration system by using GRIT's air quality device. Simply","source":"reviewed-transcript"},{"start":373.12,"text":"plug your air filtration system into it and it into the wall. It satisfies IR and","source":"reviewed-transcript"},{"start":378.82,"text":"RF remotes as well as just being able to turn your air filtration system on or","source":"reviewed-transcript"},{"start":383.72,"text":"off using the GRIT app. User levels can be put in meaning the activation level","source":"reviewed-transcript"},{"start":390.52,"text":"you want your collector to turn on can be adjusted however you see fit. The GRIT","source":"reviewed-transcript"},{"start":395.14,"text":"air quality device brings air through the side and samples it and depending on","source":"reviewed-transcript"},{"start":400.5,"text":"the user activation level can turn on or off your air quality system. If you have","source":"reviewed-transcript"},{"start":406.26,"text":"an RF remote, all you have to do is plug your device in. If your device operates","source":"reviewed-transcript"},{"start":411.62,"text":"off of an IR remote, GRIT has a sensor that you run to the eye on your air","source":"reviewed-transcript"},{"start":418.26,"text":"filtration system. The GRIT Air Quality device can also be activated by a GRIT","source":"reviewed-transcript"},{"start":423.62,"text":"trigger. For example, if when you use your table saw you know that you want your","source":"reviewed-transcript"},{"start":428.88,"text":"air filtration system on it can automatically do that before it actually","source":"reviewed-transcript"},{"start":433.44,"text":"reaches the user levels that you set. So we hope this shows how the GRIT","source":"reviewed-transcript"},{"start":438.66,"text":"automation system can be implemented into your own home shop and how it can","source":"reviewed-transcript"},{"start":442.98,"text":"make the quality of your time better. If you have any questions please reach out","source":"reviewed-transcript"},{"start":448.12,"text":"to us and let us help you design the GRIT Automation system that's right for you.","source":"reviewed-transcript"},{"start":458.88,"text":"you","source":"reviewed-transcript"}]},{"slug":"grit-air-quality","category":"dust-management","title":"GRIT Air Quality","description":"Learn how GRIT monitors air quality in your shop, tracking particulate levels and alerting you when conditions change.","tags":["air quality","sensors","monitoring","dust","particulate","pm2.5","environment"],"takeaways":["GRIT Air Quality can automate an air-filtration system through power, IR, or RF control.","The user sets the particulate activation level that determines when filtration turns on and off.","A GRIT Trigger can start filtration proactively when a specific tool is used."],"chapters":[{"start":0,"title":"Connect and control an air-filtration system"},{"start":26,"title":"Set the activation level"},{"start":41,"title":"Configure RF or IR control"},{"start":59,"title":"Activate filtration from a Trigger"}],"passages":[{"start":0,"text":"GRIT also offers a way to automate your air filtration system by using GRIT's air quality device. Simply plug your air filtration system into it and it into the wall. It satisfies IR and RF remotes as well as just being able to turn your air filtration system on or off using the GRIT app.","source":"reviewed-transcript"},{"start":26,"text":"User levels can be put in, meaning the activation level you want your collector","source":"reviewed-transcript"},{"start":32.06,"text":"to turn on can be adjusted however you see fit. The GRIT Air Quality device","source":"reviewed-transcript"},{"start":36.28,"text":"brings air through the side and samples it and depending on the user activation","source":"reviewed-transcript"},{"start":41.78,"text":"level can turn on or off your air quality system. If you have an RF remote,","source":"reviewed-transcript"},{"start":47.32,"text":"all you have to do is plug your device in. If your device operates off of an IR","source":"reviewed-transcript"},{"start":52.92,"text":"remote, GRIT has a sensor that you run to the eye on your air filtration system.","source":"reviewed-transcript"},{"start":59.6,"text":"The GRIT Air Quality device can also be activated by a GRIT Trigger. For example,","source":"reviewed-transcript"},{"start":65.56,"text":"if when you use your table saw you know that you want your air filtration system","source":"reviewed-transcript"},{"start":70.32,"text":"on, it can automatically do that before it actually reaches the user levels that","source":"reviewed-transcript"},{"start":75.96,"text":"you set. If you have any questions please reach out to us and let us help you","source":"reviewed-transcript"},{"start":81.54,"text":"design the GRIT Automation system that's right for you.","source":"reviewed-transcript"}]},{"slug":"grit-101-dust-collection-products","category":"dust-management","title":"GRIT 101: What Products Do I Need for Automated Dust Collection?","description":"Quick guide to choosing the right GRIT products for your automated dust collection setup — from gates to triggers to the Hub.","tags":["grit 101","dust collection","products","getting started","which products","gate","trigger","hub","automated"],"takeaways":["Every GRIT dust management system starts with a GRIT Hub.","Choose one GRIT Trigger per tool using the tool's phase, voltage, and amperage.","Add one collector control per dust collector, one Gate Control per blast gate, and enough Power Banks for the gate controls."],"chapters":[{"start":9,"title":"Start with the GRIT Hub"},{"start":20,"title":"Choose a Trigger for each tool"},{"start":60,"title":"Match the collector control"},{"start":99,"title":"Size the Gate Controls"},{"start":117,"title":"Add Power Banks and review the system"}],"passages":[{"start":9.07,"text":"I'm Jacqueline from GRIT. Today we're going to talk about what you need to build your perfect GRIT system in the shop. Every single GRIT system starts with a GRIT Hub, then we can build your perfect system from there. If you're wanting automated dust collection and blast gates, then you will need a Trigger for each one of your tools. We have lots to choose from. Basically, you are looking to gather the information of the phase of power for your tool, the voltage, and the amperage draw. And from there, then you can select from a wide array or variety of Triggers","source":"reviewed-transcript"},{"start":46.11,"text":"that we offer. Most of our Triggers for home shop use are a nice plug-and-play option, making installations super easy, super fast. After you find the right Trigger for your tool, then you will need to select the correct Collector device for your dust collector or dust collectors. You can have an unlimited amount of dust collectors in your system. Again, just like Triggers, we have plug-and-play options for single-phase collectors like a simple JET, something that's on and off. You would use a 120V or 220V Collector. If there's a contactor or a motor starter, you're going to","source":"reviewed-transcript"},{"start":86.11,"text":"be selecting between our MagSwitch Collector or our iR/RF Collector if it comes with a remote control. After that, then you are going to be selecting the number and sizes of Gate Controls that you need. We offer two-and-a-half-inch all the way up to 12-inch. You're going to be retrofitting these onto your existing metal blast gate; something that has a nice, easy slide without any built-in locking mechanisms is what's going to be working for you. And then finally, after you","source":"reviewed-transcript"},{"start":117.87,"text":"pick up all of your Gate Controls, you're going to need a Power Bank. If you have questions about how many of these you need, just shoot us an email. So that's how you put together your GRIT system. It's super simple: a Hub, a Trigger for each tool, a Collector for each dust collector, a Gate Control for each one of your blast gates, and a Power Bank to power everything up. If you have any other questions or want to learn more, please head to our website to watch our","source":"reviewed-transcript"},{"start":142.75,"text":"other videos or feel free to contact us via our contact page. We're happy to answer any questions you have or help you put together your own estimate.","source":"reviewed-transcript"}]},{"slug":"faq-right-for-home-shop","category":"tutorials","title":"FAQ: Is GRIT Right For My Home Shop?","description":"Common questions answered about whether GRIT's automated dust collection system is a good fit for home woodworking shops.","tags":["faq","home shop","hobby","woodworking","right for me","getting started"],"takeaways":["GRIT is modular and scalable for small home shops as well as larger installations.","Dust-collection automation removes the need to manually start the collector and adjust blast gates.","After setup, turning on a tool can automatically start the collector and open the appropriate gates."],"chapters":[{"start":0,"title":"GRIT can fit a small shop"},{"start":23,"title":"Modular and scalable design"},{"start":34,"title":"Automate dust collection"},{"start":53,"title":"Automatic collector and gate response"}],"passages":[{"start":0,"text":"Is it too much for me? I have a small home shop or I'm a small business and it's just me and my business partner.","source":"reviewed-transcript"},{"start":15.36,"text":"I think that they see our installations in our university and educational settings and it can make GRIT Automation feel unapproachable.","source":"reviewed-transcript"},{"start":23.36,"text":"But that's absolutely not the case because we are modular and scalable.","source":"reviewed-transcript"},{"start":29.86,"text":"We fit your shop exactly where it is.","source":"reviewed-transcript"},{"start":32.3,"text":"We are made for your shop, period.","source":"reviewed-transcript"},{"start":34.44,"text":"One of the reasons that people are interested in GRIT is for our dust collection automation.","source":"reviewed-transcript"},{"start":40.84,"text":"I want to be able to come into my shop, get straight to work.","source":"reviewed-transcript"},{"start":44.56,"text":"I don't want to have to worry about turning on my dust collector, adjusting my blast gates.","source":"reviewed-transcript"},{"start":49.8,"text":"And that's where GRIT can absolutely help you out in your shop.","source":"reviewed-transcript"},{"start":53.64,"text":"So you come in, you turn on a tool, everything is auto-configured once you set it up.","source":"reviewed-transcript"},{"start":59.44,"text":"The dust collector turns on, the appropriate blast gates open, and you're off to the races.","source":"reviewed-transcript"}]},{"slug":"grit-101-what-is-switch","category":"tutorials","title":"GRIT 101: What is GRIT Switch?","description":"Introduction to GRIT Switch — learn what it does, how it works, and where it fits in your automation setup.","tags":["grit 101","switch","product","what is","overview","introduction"],"takeaways":["GRIT Switch is a rechargeable remote-style Trigger for manual control of configured automations.","It can start a collector and open one or more configured blast gates.","It is useful for floor sweeps and lathes where dust collection should be controlled manually."],"chapters":[{"start":0,"title":"What GRIT Switch is"},{"start":26,"title":"Configure Switch like a Trigger"},{"start":54,"title":"Floor-sweep and lathe use cases"},{"start":79,"title":"Collector and gate demonstration"}],"passages":[{"start":0,"text":"Hi, I'm Jacqueline with GRIT and today I want to talk a little bit about our GRIT Switch.","source":"reviewed-transcript"},{"start":13.84,"text":"So we have all kinds of triggers in the system that connect directly to the tools, but we","source":"reviewed-transcript"},{"start":19.2,"text":"also have a remote style trigger called the Switch that allows you to have a little bit","source":"reviewed-transcript"},{"start":24.72,"text":"more manual control over some of the actions in your GRIT system. So the GRIT Switch is a little","source":"reviewed-transcript"},{"start":34.8,"text":"trigger that you can clip on your belt loop or there's a cradle, a charging cradle that it comes","source":"reviewed-transcript"},{"start":40.32,"text":"with. You can operate it from there as well, but it configures exactly like a trigger in that you","source":"reviewed-transcript"},{"start":47.04,"text":"can configure it to turn on a dust collector and open any number of gates that you want","source":"reviewed-transcript"},{"start":52.56,"text":"to control with this. Some uses that this is perfect for would be a floor sweep or","source":"reviewed-transcript"},{"start":59.78,"text":"a lathe where you want to have a little bit more control over when the dust","source":"reviewed-transcript"},{"start":64.84,"text":"collection is initiated. Whether you use it for turning let's say a table leg or","source":"reviewed-transcript"},{"start":71.24,"text":"doing sanding sometimes you want your dust collection on sometimes you don't. A","source":"reviewed-transcript"},{"start":75.4,"text":"switch is going to be the perfect solution for that. So in this case I have","source":"reviewed-transcript"},{"start":79.48,"text":"our switch configured where it's going to turn on our collector, open up a couple of blast gates,","source":"reviewed-transcript"},{"start":84.84,"text":"and you can see right here.","source":"reviewed-transcript"},{"start":92.6,"text":"If you have any other questions or want to learn more, please head to our website to","source":"reviewed-transcript"},{"start":96.2,"text":"watch our other videos or feel free to contact us via our contact page. We're happy to","source":"reviewed-transcript"},{"start":101.88,"text":"answer any questions you have or help you put together your own estimate.","source":"reviewed-transcript"}]},{"slug":"grit-101-compatible-blast-gates","category":"tutorials","title":"GRIT 101: Which Blast Gates are Compatible?","description":"Find out which blast gate brands and models work with GRIT Gate Control for automated dust collection.","tags":["grit 101","blast gates","compatible","gate control","compatibility","which gates"],"takeaways":["GRIT Gate Control retrofits onto compatible metal blast gates; GRIT does not supply the blast gate itself.","The gate slide must move freely without a built-in locking mechanism or other resistance.","Several common metal and quick-connect gate styles work, while stiff locking-gate designs are not suitable retrofit candidates."],"chapters":[{"start":8,"title":"What GRIT Gate Control retrofits"},{"start":31,"title":"Material and slide requirements"},{"start":70,"title":"Examples of compatible gates"},{"start":90,"title":"A locking-gate design to avoid"},{"start":128,"title":"Questions and next steps"}],"passages":[{"start":8.43,"text":"Hi, I'm Jacqueline with GRIT. Today I wanna talk a little bit about gate control and retrofitting onto your existing metal blast gates. We get a lot of questions about whether we sell blast gates, we do not, and what types of blast gates we retrofit onto. So let me walk through the ones that do work, that are compatible, and the one that does not. So you want a metal blast gate, not a plastic blast gate. You want a blast gate that has a free sliding slide. It does not have to have this extra part,","source":"reviewed-transcript"},{"start":44.65,"text":"there are some that don't have that open side to the slide so that it's a little more compact, totally your choice. They have this little locking mechanism, we just recommend that you take that all the way out. If you just loosen it, sometimes the vibration from an opening and closing repeatedly can start to wiggle it back in, which you wouldn't want any resistance to the gate control that is opening and closing your blast gate. So that style of gate is good. I know Jet, Oneida, POWERTEC all have their own versions, all of those are just fine.","source":"reviewed-transcript"},{"start":78.33,"text":"We also retrofit nicely onto Nordfab quick connect. Again, if you're looking for this nice slide, nice and smooth, no resistance. There is a new kind of POWERTEC gate, however, that doesn't play nicely with our gate control. It is the new version that has this locking feature. It is difficult, you have to put some muscle into it, even when you're controlling it manually. So this is not a good candidate for our gate control mechanisms. One way to easily tell if you're not sure, if you're searching online, is this has kind of like a two hole layout","source":"reviewed-transcript"},{"start":121.69,"text":"and the type of gate that we retrofit onto really nicely has three. If you have any other questions or want to learn more, please head to our website to watch our other videos or feel free to contact us via our contact page. We're happy to answer any questions you have or help you put together your own estimate.","source":"reviewed-transcript"}]},{"slug":"grit-101-configure-trigger","category":"tutorials","title":"GRIT 101: How Do I Configure a GRIT Trigger?","description":"Step-by-step walkthrough for configuring GRIT Trigger current sensors to automatically detect when tools are running.","tags":["grit 101","trigger","configure","setup","current sensor","configuration","how to"],"takeaways":["Label the Trigger and review both its activation level and power profile.","Use the Spike power profile for a SawStop so startup electronics do not cause an emergency lock.","Use the power graph to confirm the activation threshold, then associate the collector and all applicable gates."],"chapters":[{"start":0,"title":"Trigger configuration overview"},{"start":32,"title":"Label the inline 220-volt Trigger"},{"start":47,"title":"Set activation level and power profile"},{"start":94,"title":"Verify the threshold on the graph"},{"start":148,"title":"Associate the collector and gates"}],"passages":[{"start":0,"text":"Hi, I'm Jacqueline from GRIT. Today I want to do a little bit of a walkthrough of how to properly configure your trigger.","source":"reviewed-transcript"},{"start":16.5,"text":"So we're going to do a configuration on our SawStop today.","source":"reviewed-transcript"},{"start":21.5,"text":"So I am in the process of setting up my shop and configuring my triggers.","source":"reviewed-transcript"},{"start":27.5,"text":"I have a couple left and so I want to run through that process today with you guys.","source":"reviewed-transcript"},{"start":32.44,"text":"I have one of our inline 220-volt Trigger connected to our SawStop table saw right here.","source":"reviewed-transcript"},{"start":40.86,"text":"First thing I can do is just label it appropriately.","source":"reviewed-transcript"},{"start":47.28,"text":"A couple of things that we will surely want to do is look at both the activation level","source":"reviewed-transcript"},{"start":54.54,"text":"and the power profile for this.","source":"reviewed-transcript"},{"start":57.04,"text":"I do know that the SawStop has a computer and some capacitors that charge up.","source":"reviewed-transcript"},{"start":63.96,"text":"You will want to change the power profile from normal.","source":"reviewed-transcript"},{"start":68.38,"text":"If you don't, you might notice that in an attempt to unlock the trigger, it's going","source":"reviewed-transcript"},{"start":72.7,"text":"to stay locked and start flashing red.","source":"reviewed-transcript"},{"start":76.36,"text":"That's an emergency lock, and it's because it's going to be sensing power above that","source":"reviewed-transcript"},{"start":80.68,"text":"1.5-amp activation level as the computer in the table saw is charging up. So we","source":"reviewed-transcript"},{"start":88.8,"text":"are going to change the power profile to spike and then if we're not sure what","source":"reviewed-transcript"},{"start":94.54,"text":"the activation level should be we can always open up that graph and turn on","source":"reviewed-transcript"},{"start":100.8,"text":"the saw.","source":"reviewed-transcript"},{"start":103.3,"text":"Here you can see it starts right up. It's well above that 1.5-amp activation level,","source":"reviewed-transcript"},{"start":116.8,"text":"so we can keep that as is. If, for example, the saw ran below our preset activation level,","source":"reviewed-transcript"},{"start":125.94,"text":"we would need to drop it a little bit lower. But we're going to be just fine keeping it at 1.5","source":"reviewed-transcript"},{"start":132.28,"text":"and just making sure that we change our power profile to spike to allow for a computer to charge up and have a slight little bit of inrush current that we will delay the measurement of the GRIT system until after that occurs.","source":"reviewed-transcript"},{"start":147.92,"text":"Further configuration options would be associating it to a collector, which you can do here, and then you can also come here and associate its gate control.","source":"reviewed-transcript"},{"start":160.44,"text":"Now the way that we have it set up here in the shop is it is going to have its own tool gate,","source":"reviewed-transcript"},{"start":166.2,"text":"but we also have branch gates, so we're going to configure it with the branch gate as well.","source":"reviewed-transcript"},{"start":171.32,"text":"And that is how I go through the process of configuring a trigger. If you have any other","source":"reviewed-transcript"},{"start":179.82,"text":"questions or want to learn more, please head to our website to watch our other videos or feel free","source":"reviewed-transcript"},{"start":184.76,"text":"to contact us via our contact page. We're happy to answer any questions you have or help you put","source":"reviewed-transcript"},{"start":190.32,"text":"together your own estimate.","source":"reviewed-transcript"}]},{"slug":"faq-where-do-i-start","category":"tutorials","title":"FAQ: Where Do I Start?","description":"Not sure where to begin with GRIT? This quick guide helps you identify the right starting point for your shop.","tags":["faq","getting started","where to start","beginner","new user","first steps"],"takeaways":["Start an automated dust-collection project by contacting GRIT with a tool list.","Include phase, voltage, and amperage so GRIT can select appropriate Triggers and prepare an estimate.","GRIT supports tools from 120 volts through 480-volt three-phase, plus CNCs, lasers, lathes, and floor sweeps."],"chapters":[{"start":0,"title":"Where to start"},{"start":10,"title":"Contact GRIT with your goals"},{"start":19,"title":"Provide tool power details"},{"start":31,"title":"Supported tool range"}],"passages":[{"start":0,"text":"Where do I start?","source":"reviewed-transcript"},{"start":6.64,"text":"Where do I start is a question that I get probably more often than anything.","source":"reviewed-transcript"},{"start":10.72,"text":"And I would say that if your goal is to automate your dust collection, you start by contacting us.","source":"reviewed-transcript"},{"start":19.6,"text":"If you send us a list of your tools, the phase of power, the voltage, the amperage of your tools,","source":"reviewed-transcript"},{"start":25.04,"text":"we can get you an estimate that day. We have triggers that cover everything that you would","source":"reviewed-transcript"},{"start":31.2,"text":"potentially have in your shop from 120-volt all the way up to 480-volt three-phase. We work with CNCs and","source":"reviewed-transcript"},{"start":38.8,"text":"lasers and we even have a remote style switch for when you're using a lathe or a floor sweep.","source":"reviewed-transcript"}]},{"slug":"magswitch-install-contactor","category":"tutorials","title":"MagSwitch Installation — Any Collector with a Contactor","description":"How to install GRIT MagSwitch on dust collectors that use a magnetic contactor for motor control.","tags":["magswitch","installation","contactor","dust collector","wiring","motor","relay"],"takeaways":["Turn off the breaker and remove any built-in remote-start module before wiring the MagSwitch Collector.","Power the device from the incoming mains terminals and pass one motor lead through the current transformer.","Connect the four-wire harness to the magnetic coil and motor-starter terminals before closing the enclosure."],"chapters":[{"start":0,"title":"Installation scope and breaker safety"},{"start":30,"title":"Remove a remote-start module and open the enclosure"},{"start":70,"title":"Connect incoming power"},{"start":130,"title":"Install the current transformer"},{"start":161,"title":"Connect the four-wire harness"},{"start":222,"title":"Route wires and close the enclosure"}],"passages":[{"start":0,"text":"We're going to walk through the installation of the GRIT MagSwitch Collector device on a Oneida V3000 Dust Collector.","source":"reviewed-transcript"},{"start":16.34,"text":"Before we start, don't forget to turn off the breaker.","source":"reviewed-transcript"},{"start":19.64,"text":"This process of setting up the MagSwitch collector device applies to any dust collector that has a magnetic contactor, like you see here.","source":"reviewed-transcript"},{"start":30.84,"text":"Some dust collectors, and many Oneida dust collectors, come with a remote start module built in.","source":"reviewed-transcript"},{"start":38.12,"text":"The first step will be to remove that module from inside of the contactor enclosure.","source":"reviewed-transcript"},{"start":43.12,"text":"This dust collector does not have that module so we're going to proceed after it had been removed if you had one.","source":"reviewed-transcript"},{"start":50.12,"text":"So first step, let's take off the cover.","source":"reviewed-transcript"},{"start":56.12,"text":"First thing you might notice is there's lots of wires, but don't worry, rest assured, we're going to walk through exactly how you connect the GRIT MagSwitch collector device to this contactor.","source":"reviewed-transcript"},{"start":66.12,"text":"Let's walk through what all of these different screw terminals are.","source":"reviewed-transcript"},{"start":70.12,"text":"First, the top level screw terminals, there's four in this contactor. There's wires coming","source":"reviewed-transcript"},{"start":78.58,"text":"from the incoming power from the wall and going into two contacts in the top of this contactor.","source":"reviewed-transcript"},{"start":86.76,"text":"That's the black wire and the white wire. This is the incoming power. These two is where we will","source":"reviewed-transcript"},{"start":92.12,"text":"plug in the wires from the GRIT two-wire harness for the power for our GRIT","source":"reviewed-transcript"},{"start":99.08,"text":"device. Start with the power wire. It looks like this. There are two wires, a","source":"reviewed-transcript"},{"start":103.76,"text":"red and a black, and they will plug into the mains power coming in from the wall","source":"reviewed-transcript"},{"start":111,"text":"and that will be on the top side of collector. This will work for both","source":"reviewed-transcript"},{"start":115.74,"text":"single-phase dust collectors and three-phase dust collectors.","source":"reviewed-transcript"},{"start":122.12,"text":"Now these two wires have been connected and now we have power for our GRIT device.","source":"reviewed-transcript"},{"start":130.64,"text":"Next step, let's tackle the current transformer.","source":"reviewed-transcript"},{"start":134.5,"text":"That's the little thing that looks like a doughnut.","source":"reviewed-transcript"},{"start":137.54,"text":"We need to put one of the wires going to the motor through this hole.","source":"reviewed-transcript"},{"start":142.9,"text":"For a single-phase dust collector, you'll have two wires coming out from the bottom.","source":"reviewed-transcript"},{"start":148.9,"text":"For a three-phase dust collector, you would have three.","source":"reviewed-transcript"},{"start":151.68,"text":"doesn't matter which of these you choose, just unscrew one of them and put it","source":"reviewed-transcript"},{"start":156.12,"text":"through the doughnut and then put the wire back into the bottom of the motor","source":"reviewed-transcript"},{"start":161.16,"text":"starter. Next we'll tackle the last of the wire harnesses. That's the wire","source":"reviewed-transcript"},{"start":170.1,"text":"harness that has four wires. It's got a blue, a red, a green, and a black. First","source":"reviewed-transcript"},{"start":175.98,"text":"step is all the way in the back of the contactor there's the second connection","source":"reviewed-transcript"},{"start":182.7,"text":"to our magnetic coil also referred to as A2. Plug the black wire into this port","source":"reviewed-transcript"},{"start":189.24,"text":"in the back of the contactor. Next we will be connecting the green and the red","source":"reviewed-transcript"},{"start":198.42,"text":"wires together and we're plugging it into the fourth connection in our","source":"reviewed-transcript"},{"start":203.94,"text":"contactor. And the final wire, the blue wire, plugs into the bottom of the motor","source":"reviewed-transcript"},{"start":210.7,"text":"starter at a port that has the number 95.","source":"reviewed-transcript"},{"start":221.82,"text":"So next it's time to feed all the wires from the GRIT MagSwitch Collector device","source":"reviewed-transcript"},{"start":226.42,"text":"through the hole that we drilled or popped out of the enclosure.","source":"reviewed-transcript"},{"start":236.18,"text":"And the final step is to plug in all of the wire harnesses to the to the wires","source":"reviewed-transcript"},{"start":244.32,"text":"that we just pushed through. There's only one way to connect each one so don't","source":"reviewed-transcript"},{"start":248.26,"text":"worry about connecting them incorrectly.","source":"reviewed-transcript"},{"start":256.42,"text":"Finally, make sure all of the wires are nice and tucked inside of the box so that nothing","source":"reviewed-transcript"},{"start":267.28,"text":"gets snagged when we put the lid back on.","source":"reviewed-transcript"},{"start":273.3,"text":"Attach the lid, screw everything in place.","source":"reviewed-transcript"},{"start":279.46,"text":"Go back to the breaker, turn on the switch, and we're installed.","source":"reviewed-transcript"},{"start":286.42,"text":"Thank you.","source":"reviewed-transcript"}]},{"slug":"gate-control-installation","category":"tutorials","title":"GRIT Gate Control Installation","description":"Complete installation guide for GRIT automated blast gate controls — mounting, wiring, and initial setup.","tags":["gate","installation","blast gate","setup","mounting","wiring","gate control","install"],"takeaways":["Start with a freely moving metal blast gate and prepare the slide so the actuator does not fight burrs, friction, or a stop bolt.","Use the supplied guides and brackets to keep the rod, bearing arm, and gate slide aligned before tightening the hardware.","Power and bind the Gate Control before attaching the actuator arm, then calibrate open and closed positions without leaving the servo under stress."],"chapters":[{"start":2,"title":"Compatible blast gates and installation kit"},{"start":59,"title":"Prepare and lubricate the gate slide"},{"start":302,"title":"Drill the mounting holes"},{"start":415,"title":"Install and align the rod brackets"},{"start":673,"title":"Attach the tab and slide brackets"},{"start":964,"title":"Power and bind the Gate Control"},{"start":1096,"title":"Center the actuator and attach the arm"},{"start":1250,"title":"Calibrate open and closed positions"},{"start":1461,"title":"Installation recap"}],"passages":[{"start":2.9,"text":"Hi, I'm Marco Unieto with GRIT Automation and today I wanted to show you the GRIT Gate Control System and how to install it and how to calibrate your arm properly during that installation. To begin with, the GRIT Gate Control retrofits onto metal blast gates. There's a variety of different brands out there, but the key is that they're a free moving metal blast gate. There's ones out there that they're developing now that have some locking mechanisms but it's all manual and our system won't really work on those.","source":"reviewed-transcript"},{"start":36.06,"text":"So you're better off just finding the inexpensive metal blast gate and we retrofit right onto that. So this kit comes with tools to help you install the device on your metal blast gate. We have a couple different screwdrivers, a nut driver, a drill bit for drilling holes in the tab of the blast gate along with the other parts that I'll go into a little more detail as we move along. Before we get started with installing the GRIT actuator onto the blast gate, we want to start with doing some prep work to it to ensure the best results.","source":"reviewed-transcript"},{"start":69.78,"text":"The larger the gate is, the more important it is to do this prep work. On a small two inch like this, two and a half inch, it slides pretty easily and the prep work doesn't always need to be done, but we suggest you do to ensure, again, the best results possible. So to start with, we've got our pull tab right here and we're going to take this slide out by removing the screws and opening up the body of the blast gate. So I'm just going to take a screwdriver, screw gun here and remove all six screws.","source":"reviewed-transcript"},{"start":108.86,"text":"Now on some units they won't have threaded bodies but they'll have a nut and bolt going through the housing and it'll be a little different but the approach is all the same. So we'll make sure we save all of our screws here and now I have the gate body taken apart and the slide taken apart. Now the first thing I'm going to do is to prep the slide and to do that, I'm going to use a file or sandpaper or something along those lines. I like to use a 120, maybe 220 sandpaper and we're going to sand off the corners,","source":"reviewed-transcript"},{"start":146.58,"text":"any sharp edges. You can rub your fingers over the edges and you can feel little burrs and some sharpness to it. So the goal is to remove all that and make it slide as smoothly as possible in the gate body. So I'm just going to work the edges here and it's not rocket science, you know, just be careful as you go and I'm going to make sure I get these corners and make sure everything is nice and smooth and I know that I've probably done a good job when I can take my thumb or","source":"reviewed-transcript"},{"start":183.49,"text":"finger and rub it along there and it just feels nice and glassy smooth and I think I've accomplished that here. So the slide is prepped, while I've got this open I'm going to just do a visual inspection, make sure there's no manufacturing defects, anything like that and, you know, this looks pretty good and if you want to take this one step further, we spray the insides with a silicone lubricant that really helps the sliding. It'll dry up enough that it's not going to gum up with dust unless you run your collector","source":"reviewed-transcript"},{"start":216.49,"text":"immediately after with a lot of dust into the gate body. Make sure I get the slides and in fact the face, it can't hurt to do the face also and I just know that the entire inside of the body is lubricated well and this sort of soaks into the metal and creates a better environment for the slide to operate. So that's lubricated, we've got the slide guide sanded down and we can put it back together. So another element that's important, I'll show you on this four inch, is that the stop","source":"reviewed-transcript"},{"start":257.01,"text":"nut here or the stop bolt, it's important to remove that. What can happen is throughout time, your gate's going to vibrate a bit and this sometimes can work its way in and cause friction on your gate, end of the day this isn't needed at all, especially once you're putting the GRIT Gate Control on. So make sure you remove it completely and it's gone. So next I'm going to put the screws back in place and tighten up the body. You don't need to put in these two right here and we ensure that it's sliding nice","source":"reviewed-transcript"},{"start":294.35,"text":"and you can see how nice this slides after I did that. I can feel the difference from the prep work that I've done on it. Alright so now that we have that part done, we've prepped the gate, we're going to move on to actually installing the gate actuator. To begin with, we're going to grab the drill guide and if you have multiple gates, you only want to use these once. They're made out of plastic. Once you send a drill bit in here, you're going to wallow out that hole a little bit","source":"reviewed-transcript"},{"start":320.41,"text":"and it will cause an error if you try to use this on another gate. So only use it once. You're going to slide it over the tab and you can usually just eyeball it center and we're going to take our drill bit that we provide and I'm going to make sure it's nice and centered on that tab and I'm going to drill my first hole. Alright so I've got my first hole. Now before I drill my second hole, I'm going to take this bit.","source":"reviewed-transcript"},{"start":362.51,"text":"You can use a little screw, a nail, anything like that but I'm going to stick it through the hole I drilled in the slide guide to ensure the alignment is proper. So I've got that in there holding my slide guide in place and now I'm going to drill my second hole. You can pull that out and then you can see we've got our two nice holes ready to go. One thing you want to check is on the back side after you've drilled these holes, there might be some burrs. It's important to try to knock those off.","source":"reviewed-transcript"},{"start":402.94,"text":"You can do it with a file, maybe take your bit from the opposite side and see if that'll knock them off, some sandpaper, whatever works for you. We've drilled the holes now in our tab and we can now move on to the next step. I'm going to move on to the 4 inch gate which is probably the most common gate people have and we already have our holes drilled here and the process is the same for every gate. The only things you'll find is once we move to a 7 inch gate we just use some more robust","source":"reviewed-transcript"},{"start":430.98,"text":"parts but the installation and process is exactly the same. Here again we've got our holes drilled in our tab and we've got our screws back in place and the body secured and things have been prepped and it's moving nice and free. We can see that. This body also has threaded holes going through the body. You're going to take the rod bracket and stick one of our screws through it and we're going to mount these to the underside and I'm going to send these screws all the way through and","source":"reviewed-transcript"},{"start":476.74,"text":"pretty much I'd call it hand tight. You don't want to crank down 100% of the way but 80% of the way, make sure that they're rigid as they've installed because we're going to move them just a little bit as we proceed to the next steps. We've got the first rod bracket so these things can move. In this installation with the threaded inserts I'm going to take my rod and I'm going to stick it through and what this does is this now aligns the two rod brackets so they're","source":"reviewed-transcript"},{"start":522.29,"text":"in line with each other and what you can do, I'll do it this way, is I'm going to slide it all the way this way and tighten that back one down all the way. In this gate I can actually push this rod back it through. If it doesn't work for you on some other model gates meaning that this butts into the collar of the gate body then you can, right now I would just tighten this down but if you can't push it through then just know that you've had this thing more or less secure, it's not","source":"reviewed-transcript"},{"start":555.74,"text":"super loose but you can take this out and then tighten it down all the way. You'll be able to move these slightly when the time comes to put this in and put the set screws down. So you can see this is still fitting in no problem. Now I'm going to turn the gate over and you can see we have the mounting screws showing themselves there and we're just going to put the gate body onto it so it just should fit nice and easily especially on a gate body like this.","source":"reviewed-transcript"},{"start":591.57,"text":"You might find you have to do a slightly different order of operations if you're dealing with a loose bolt nut meaning that you might slide the bottom nut and the body is still loose because the holes not threaded and it wasn't able to bring all this tight. So in that case it's a similar thing that you just will get your body on and get your nuts on the bolts there and then you can go through the same process of aligning your rod brackets here.","source":"reviewed-transcript"},{"start":627.93,"text":"So now we can tighten, I'm just going to use a pair of pliers, you can use a ratchet, a crescent wrench, whatever works for you and just give these guys a good tightening down and just like anything you don't want to go crazy tightening down. Our components are primarily made out of plastic here so you can damage them if you use all of your muscle or you know if you use a drill too much you could possibly break through and drive screws through the body, you don't want to do that.","source":"reviewed-transcript"},{"start":662.4,"text":"So we just make sure they're nice and snug, that's good, everything's still operating fine, we've got our gate body attached and now we're ready to go on to the next step and that's going to be putting on the tab bracket. We've got our holes drilled and we're going to slide the tab bracket on and what I'm going to do is I'm going to look at it and make sure I've got my holes aligned so when I come back to attach the next part I know that the screws are going to make it through to the hole there.","source":"reviewed-transcript"},{"start":705.32,"text":"So all we're doing is friction fitting the tab bracket onto the tab at this point. So the next step is we're going to take the slide bracket which has a connection bracket in the bearing arm, it should come assembled like this to you and we're just going to slide that over your rod and it should line up, there are grooves that line up and sort of interlock the two pieces together and again we're going to start by trying to get our two screws through the connection bracket into the tab bracket and through the tab and","source":"reviewed-transcript"},{"start":748.48,"text":"basically sandwiching all these pieces together and holding them snug. Take a drill or a screwdriver and I'm not going to do it super tight, I'm just going to get them in most of the way so it's holding in place, we'll worry about snugging them down at the very end. So those are in place now, now this is all connected and we can see things are still sliding smoothly but what we want to do is dial it in with these two screws and these two screws allow us to adjust the height, the small bits of height and our left to right.","source":"reviewed-transcript"},{"start":797.26,"text":"So next what I'm going to do is I'm going to make sure that the bearing arm is parallel to the gate body and the slide, we don't want this arm racked one way or the other. So I'm just going to visually look at it and make a small adjustment and sometimes you can tell I've got this just a little snug so it's not allowing me to move it very easily. I'm just going to loosen those two screws up that I just put in and it's going to allow","source":"reviewed-transcript"},{"start":835.36,"text":"me to move this up and down and create that parallelness that I need. So I'm just going to look at it and I think that looks good and now I'll tighten those two down and then the next step is the other two screws which is our left to right. The best way to do that is pull your gate out all the way and wiggle it left and right and you're going to see the difference as those screws slide in the slot of this connection bracket and go left","source":"reviewed-transcript"},{"start":869.8,"text":"and right and then pick the spot in the middle of that and secure those two screws down. And again I'm using a drill here but you can easily just do this by hand, make sure you don't use too much force driving these screws down into these components here. So now that we have all this and we're happy where this rod bracket is, on this particular model the rod bracket supplied is just the right length. Other models you might have a little extra","source":"reviewed-transcript"},{"start":900.24,"text":"that you might want to push back. So for example you might have a gate that sticks out a bit. You can leave it or you can push it back. I like to push it back to a spot that allows the bearing arm to open up all the way and I know visually that as I'm calibrating it once it reaches here I know it's open and I really don't have to worry about if I'm putting the arm under strain, if I'm going too far or something like that. So now that","source":"reviewed-transcript"},{"start":934.4,"text":"I have my bearing arm where I want it and everything's in alignment I'm going to tighten the two set screws on the back to make sure the rod is nice and secure. And again this is something you just want to snug up, you don't need to crank down on it and this guy is not going anywhere. So now we've got it sliding no problem and that's most of the installation of the gate control. The last thing we're going to do is attach the arm. Now before attaching the arm you want to have your gate installed and powered and all gates","source":"reviewed-transcript"},{"start":979.57,"text":"are going to be powered by the GRIT Power Bank. We also have, you're going to have a wire that plugs into your gate. We have a little green connector that goes into the gate here and what you're able to do is to daisy-chain, meaning going from one gate to the next with power. And you can see that the gate is lighting up now for the first time and before we can attach this arm you are going to bind your Gate Control device to your Hub. You can tell that the gate is flashing red and green; that is common of","source":"reviewed-transcript"},{"start":1023.3,"text":"any GRIT device. The LED will flash red and green when that device has not been bound to the system, and you'll need to do that before proceeding any further. If you don't know what binding is, look in the GRIT manual and it will tell you step by step how to do it. It's a very simple process. Now that you see your device is solid red—it could be green also—it's telling you that it is bound to the system and is ready to be calibrated.","source":"reviewed-transcript"},{"start":1051.73,"text":"So I'm going to go into the GRIT App, and if you go under Devices and under Gate, you will see a line that says Gate with a hyphen and then some miscellaneous letters and numbers. To determine whether that is your gate, you can press the Find icon on that line and it will flash red and green to let you know that you're approaching the right gate. When you first are on the system, you might have six, seven, or more gates on a system and you want to know which one you're actually working on, and the initial populated names","source":"reviewed-transcript"},{"start":1090.03,"text":"are a little confusing because they're random letters and numbers. So now that I've found the gate that I want to work with I'm going to go into that while I'm in the app and then I can rename it and I'll just call this test gate. I'm going to calibrate it by pressing the calibrate button and I'm going to, it automatically moves to center but you can ensure it moves to center by just pressing the move to center button on the calibration page in the app and what that means is now you can move your gate into a position that's","source":"reviewed-transcript"},{"start":1134.27,"text":"more or less halfway open. So we're in the middle position, this is in the middle position and now we're ready to put our arm on. So we'll start by taking the top hat and flat off our tab here and I'm going to make sure that we're still more or less halfway open. Now I can take the gate arm, I'm going to put it over the post and try to connect it to the servo. Now the tines on the servo here are going to make you have to either open","source":"reviewed-transcript"},{"start":1175.7,"text":"or close the gate a little bit to get it to fall down and lock itself securely into place. So actually I just got it there, it still looks good, still in a middle position but if your gate actually has to move a little bit open or closed that's fine as long as you're more or less in that range while getting the arm on. And I can take our mounting screw put that on and tighten it by hand or be careful using a drill. We're just going to snug that","source":"reviewed-transcript"},{"start":1206.92,"text":"down and then we're going to put our hat washer back on along with some other filler washers. And when doing this because gates all differ a bit in terms of their tab height and slight variations you might find that you need to stack your hat washer and flats slightly different. That's why we give you a variety of different sizes. So if you need to stack a little bit more underneath so that this is riding a planer to the gate body and the slide you'll figure","source":"reviewed-transcript"},{"start":1243.14,"text":"that out as you do the install. So we've put our top nut on here and now everything here is secure. Next what we're going to do is while we're still in this calibration page we're going to send the gate to open. It just moved just a little bit and now we just keep pressing more open on the calibration page until it is in the final position that we want for being open. Now you can't press really fast on the button to make it move smoothly.","source":"reviewed-transcript"},{"start":1280.57,"text":"You have to be a little bit patient. Just tap it once, tap it again. You're going to go until you're open. Now if you're retrofitting and you have duct work on your gate already you're going to have to do it by looking at the gate and seeing if the arm is stressed. If I don't know exactly where open is and I'm not wanting to strain this before I give it power I can position it so that I know this slide arm is when it's in the right position","source":"reviewed-transcript"},{"start":1311.57,"text":"is right there versus if I had the rod out more like that you could do that but you might want to put a piece of tape on here or something and that will give you a visual indicator as to what the maximum open is versus keeping on hitting open and putting a lot of stress on the arm and servo which can damage the system. So we make sure that things are in the right position. The very end of this rod meets up with the bearing arm here so","source":"reviewed-transcript"},{"start":1343.3,"text":"I know even if I had duct work on here and I couldn't see the slide in here that I know this is my fully open position. So I'll power it back on and go back to my calibration. The gate calibration page has a power graph. While you open or close your gate you should see a spike in power meaning the actuator is working at that time and it's showing you the amperage draw. At a resting state if you keep seeing spikes that means that the system","source":"reviewed-transcript"},{"start":1381.34,"text":"is under stress and you need to back off your open or your close to prevent your servo from burning out. So in this case I feel that I've gotten the right open position. Now I'm going to hit close and we're not closed all the way so I'll just keep hitting closed just little by little, a little patience. And as you're doing this you know you just keep looking at it and see when it stops wanting to slide in. And there it felt like I could hear it.","source":"reviewed-transcript"},{"start":1429.92,"text":"There's all sorts of indicators that you'll find depending on your scenario. And because I felt like that last one I put in it felt like it really pushed it in there. I'm going to back it off one just to make sure I'm not putting a lot of strain on the motor here. So now I can open, close, open, close. I'll do that a few times to make sure everything is operating nice and smoothly and that seems to be the case. So the key points to take","source":"reviewed-transcript"},{"start":1461.91,"text":"away from the installation of the gate actuator and the gate arm is to start with prepping your gate. Make sure that it's operating smoothly. Do some sanding, take it apart. If you can put some silicone lubricant or perhaps some graphite, something like that that helps enhance the sliding of the slide here. That's a major point. Your installation of the gate body, you'll have two different scenarios. One you have a threaded body and the other you don't and they'll just be a slight variation in how you connect it. But the major thing is","source":"reviewed-transcript"},{"start":1498.17,"text":"do not attach your gate arm until you've bound your gate actuator to the system and then you go through the calibration process. It's extremely important and that will prevent any damage to your system. I'm Marco Unieto with GRIT Automation. Thank you for watching and have a great day.","source":"reviewed-transcript"}]},{"slug":"gate-calibration","category":"tutorials","title":"GRIT Gate Calibration","description":"Complete guide to calibrating your GRIT automated blast gates for accurate open/close positioning.","tags":["gate","calibration","setup","blast gate","servo","positioning","adjustment"],"takeaways":["Confirm the Gate Control is bound to the GRIT Hub before beginning calibration.","Adjust open and closed positions in small increments while watching the arm and the power graph for signs of stress.","Back the setting off if the arm bends, power remains elevated, or a gate stop begins to bind."],"chapters":[{"start":1,"title":"Confirm the Gate Control is bound"},{"start":16,"title":"Find the correct gate in the device list"},{"start":64,"title":"Open the calibration controls"},{"start":89,"title":"Set the open position"},{"start":176,"title":"Back off an overstressed position"},{"start":191,"title":"Set the closed position"},{"start":238,"title":"Check gate stops and binding"},{"start":300,"title":"Run a final open-close test"}],"passages":[{"start":1.33,"text":"So here you can see that the light is solid green on the device and This means that it is bound to the hub and now we have control over this gate Which means it's time to calibrate the gate What you'll do is go into your devices and in this case we're going to go under the gate devices and look for our gate that we want and one thing to note is that on your list of Gates when you first bind them, you might have a half dozen a dozen or so gates But you'll have all these random numbers and letters","source":"reviewed-transcript"},{"start":40.41,"text":"Describing each gate and you don't really know which one is which to find the gate you want to calibrate There's a little magnifying glass Next to each one and if you keep pressing them eventually It will flicker and that way you know what gate you're working with so now that I know which gate I'm on I'm going to go into that gate and I'm going to calibrate it and I'm going to go into the calibration menu What it brings up is an open and close button So if I hit open it's in the open position I hit close","source":"reviewed-transcript"},{"start":75.97,"text":"It's in the closed position and you can see that it's not throwing very far and we do that on purpose So we don't damage the servo because gates of different sizes have different throws and this way we control What's happening? so I'm going to simply go to the more open button and That's going to take it to its most extreme more open that's set right now If I keep pressing that button, it will move in small increments and you just keep pressing it Until the gate is in the open position in the most open position that you'd want","source":"reviewed-transcript"},{"start":111.77,"text":"things to consider as you're doing this is You can over calibrate or over open or close the gate and put it into a stressed mode and A way you can tell that is through a couple means One is just physically looking at the gate and if you're noticing as I was doing this I went to way more open and what I want you to look at is this arm and I'm going to just keep going more open and you're going to see that slide's going to stop opening","source":"reviewed-transcript"},{"start":146.13,"text":"But this is going to start to bend a little bit and you'll be able to see that stress and we don't want that Now while it's in this overstressed position you can also look at the graph of power that the calibration menu has and It will show that the power is Spiking meaning that it's in a stressed position So it's another way for you to tell that you have this too far open or closed So I'm gonna back this off and I'm gonna keep backing it off until I see It in a more relaxed neutral position, which it is now","source":"reviewed-transcript"},{"start":188.81,"text":"So I've calibrated this all the way open now I'm gonna hit close and I'm gonna do the same thing keep hitting more closed Until I reach that point that is closed enough and As we just said you're gonna keep going until you feel that there's a stressed position or that you just know it's closed enough and Because I don't have this hooked up to pipe I can see the inside of the gate and I can visually just tell Where's a good spot which is right there? So now I can just hit open hit closed open","source":"reviewed-transcript"},{"start":230.77,"text":"Close and everything seems to be working smooth. I'm not overstressing the arm or the actuator causing damage now a couple little details you want to think about are Some gates have stops for example this gate we can see that there is a nub right here and oftentimes if you Close it or open it too much This nub can get wedged in the top or bottom of your gate and causing it to feel like it's binding and you might feel Like something's wrong. Keep in mind that that could happen. So as","source":"reviewed-transcript"},{"start":270.89,"text":"You've closed your gate or opened it if it feels like it's sticking Realize that you might have closed it a little too much and that that nub might be binding in there All gates do not have that For example gates like this just have a pass-through and they stop themselves So you wouldn't have that type of scenario happening with a gate like this But many gates do have the stop nub that can cause some problems and something to be aware of To make sure you're happy with it","source":"reviewed-transcript"},{"start":302.65,"text":"That's sounding good to me. It's smooth. It's closing and opening all the way. We've got a winner here and That's all there's to it","source":"reviewed-transcript"}]},{"slug":"magswitch-install-laguna","category":"tutorials","title":"MagSwitch Installation — Laguna Dust Collector","description":"Step-by-step MagSwitch installation specifically for Laguna brand dust collectors.","tags":["magswitch","installation","laguna","dust collector","wiring","specific model"],"takeaways":["Disconnect power before opening the Laguna dust collector's contactor enclosure.","Install the current transformer on a motor lead and connect the two-wire harness to incoming mains power.","Wire the four-wire harness to the start and stop terminals, then connect and secure the MagSwitch Collector."],"chapters":[{"start":0,"title":"Installation overview and power-off step"},{"start":20,"title":"Identify the three harness components"},{"start":51,"title":"Install the current transformer"},{"start":95,"title":"Connect device power"},{"start":111,"title":"Wire the start and stop controls"},{"start":211,"title":"Connect the MagSwitch and replace the lid"}],"passages":[{"start":0,"text":"We're going to walk through what it looks like to install the GRIT MagSwitch Collector device on a Laguna dust collector. Let's check it out.","source":"reviewed-transcript"},{"start":13.6,"text":"First things first, we should kill the power. There are three parts that need to be installed when you're putting in a MagSwitch Collector.","source":"reviewed-transcript"},{"start":20.4,"text":"First part is the two cable connector that goes to your power, so that's going to run to the two lines of your AC.","source":"reviewed-transcript"},{"start":27.2,"text":"And then we have the current transformer or the little donut.","source":"reviewed-transcript"},{"start":31.08,"text":"And then the third item is the connector with four wires.","source":"reviewed-transcript"},{"start":35.96,"text":"After that we're going to unscrew slightly on the bottom that holds the lid on.","source":"reviewed-transcript"},{"start":42.14,"text":"And I found that using some tape on the lid helps setting things up.","source":"reviewed-transcript"},{"start":51.2,"text":"First thing we can do is we're going to put in the current transformer.","source":"reviewed-transcript"},{"start":62.14,"text":"That's the little donut shaped guy.","source":"reviewed-transcript"},{"start":65.44,"text":"On the wire that runs to the motor of your dust collector which is going to be on the","source":"reviewed-transcript"},{"start":70.42,"text":"bottom side of your contactor. Unscrew one of those legs and screw it back in.","source":"reviewed-transcript"},{"start":83.44,"text":"This allows GRIT to know when the dust collector is actually running and","source":"reviewed-transcript"},{"start":88.36,"text":"measure the current that's being drawn. The next part we want to do is connect","source":"reviewed-transcript"},{"start":95.04,"text":"the power wires. This is the two wire connector. This goes to the legs on the","source":"reviewed-transcript"},{"start":101.46,"text":"top side of the contactor that are coming from the wall, the mains power. This is","source":"reviewed-transcript"},{"start":105.38,"text":"to then give power to the actual GRIT MagSwitch device.","source":"reviewed-transcript"},{"start":111.38,"text":"Next we'll tackle the last of the wire harnesses. That's the wire harness that","source":"reviewed-transcript"},{"start":115.56,"text":"has four wires. It's got a blue, a red, a green, and a black. There's two switches.","source":"reviewed-transcript"},{"start":120.48,"text":"There's one that you push to turn it on and there's one that you would push to","source":"reviewed-transcript"},{"start":124.1,"text":"then turn it off. The one that you use to turn it on is this top one here and it","source":"reviewed-transcript"},{"start":128.96,"text":"has it's marked with normally open and there's a terminal of three and a terminal","source":"reviewed-transcript"},{"start":134.6,"text":"four. For the terminal three we are going to unscrew and plug in the red wire.","source":"reviewed-transcript"},{"start":144.82,"text":"Next we're going to take the blue wire and plug it into the other side terminal 4.","source":"reviewed-transcript"},{"start":158.32,"text":"We're going to take the black wire out of terminal 3 and we want to twist that together","source":"reviewed-transcript"},{"start":174.42,"text":"with the GRIT black wire","source":"reviewed-transcript"},{"start":184.7,"text":"and put on a wire nut.","source":"reviewed-transcript"},{"start":189.42,"text":"And finally, we plug the green wire","source":"reviewed-transcript"},{"start":193.14,"text":"into terminal 3","source":"reviewed-transcript"},{"start":195.86,"text":"of this off switch.","source":"reviewed-transcript"},{"start":204.42,"text":"Replace any wires that you had taken off.","source":"reviewed-transcript"},{"start":211.42,"text":"Next, grab the MagSwitch Collector device and plug in each of the connectors.","source":"reviewed-transcript"},{"start":232.92,"text":"If there's room within the box, you can go ahead and leave this unit inside.","source":"reviewed-transcript"},{"start":238.02,"text":"If there's not, sometimes you have to drill a little hole on the side and run","source":"reviewed-transcript"},{"start":241.7,"text":"the wires through. And that's it.","source":"reviewed-transcript"},{"start":245.28,"text":"Take the tape off and replace the lid.","source":"reviewed-transcript"},{"start":254.6,"text":"And that's how you install the GRIT MagSwitch Collector device in a Laguna","source":"reviewed-transcript"},{"start":257.94,"text":"dust collector.","source":"reviewed-transcript"},{"start":262.92,"text":"Thank you.","source":"reviewed-transcript"}]},{"slug":"ivac-gate-control","category":"tutorials","title":"GRIT iVac Gate Control","description":"Setup and configuration guide for using GRIT with iVac automated blast gates.","tags":["ivac","gate control","automated","blast gate","setup","configuration"],"takeaways":["Existing iVac blast gates can remain in place when a shop adds GRIT automation.","The GRIT iVac Gate Control connects between the existing iVac power supply and gate control input.","The retrofit keeps prior gate hardware in service instead of requiring a rip-and-replace installation."],"chapters":[{"start":2,"title":"Keep existing iVac gates in service"},{"start":29,"title":"The GRIT iVac Gate Control"},{"start":37,"title":"Connect power and control wiring"},{"start":71,"title":"Mount the control and finish the retrofit"}],"passages":[{"start":2,"text":"Hi everyone, my name is Marco Unieto with GRIT Automation. Today I want to show you the GRIT iVac Gate Control. Many shops already have iVac gates installed and want to keep that investment as part of the shop. The GRIT iVac Gate Control lets the GRIT system operate those existing gates without requiring them to be replaced. It's a really simple process. All you're gonna do is take the power supply that came with your iVac gate and you're gonna plug that into the input","source":"reviewed-transcript"},{"start":48.22,"text":"and we've got a little jumper cable that jumps out and will supply power to the iVac gate and you'll use a control wire to plug in and this goes into the control input for the GRIT iVac control device and you can use some VHB tape and just stick this to your iVac system so it's that simple. Takes all of 20 seconds to hook this up and you're off to the races.","source":"reviewed-transcript"}]},{"slug":"remote-control-programming","category":"tutorials","title":"Remote Control Programming","description":"How to program and configure GRIT remote controls for manual override of your automated system.","tags":["remote control","programming","keyfob","manual override","rf","wireless"],"takeaways":["GRIT supports both infrared and radio-frequency remotes used by dust collectors and air filters.","Choose a preset when available; otherwise use Custom and teach the Hub each required command.","Test captured RF commands and save the working command before repeating the process for speed control."],"chapters":[{"start":0,"title":"IR and RF remote types"},{"start":32,"title":"Choose a preset or Custom"},{"start":68,"title":"Learn and test IR commands"},{"start":133,"title":"Why power-off may replace the remote off command"},{"start":157,"title":"Learn, test, and save RF commands"}],"passages":[{"start":0,"text":"There are two different types of devices that use the infrared or radio frequency RF type of remote controls to control those devices.","source":"reviewed-transcript"},{"start":12,"text":"Dust collectors sometimes do and certain air filters sometimes do.","source":"reviewed-transcript"},{"start":17,"text":"We're going to look at how to program those devices and when GRIT already has a preset that can make setup even easier.","source":"reviewed-transcript"},{"start":26,"text":"here. How best to train your hub for new remotes for your devices. So an infrared","source":"reviewed-transcript"},{"start":32.54,"text":"remote typically has an LED in the front. We select IR remote and we are then","source":"reviewed-transcript"},{"start":44.48,"text":"presented with some extra settings. One of them controls the speed at which we","source":"reviewed-transcript"},{"start":50.12,"text":"want our air filter to run at. If the type of air filter you have is shown in","source":"reviewed-transcript"},{"start":55.58,"text":"this list then you can select it and everything will just work. If it's not","source":"reviewed-transcript"},{"start":60.22,"text":"then select custom and now we need to train it on the different settings of","source":"reviewed-transcript"},{"start":68.12,"text":"that remote. So let's start with the on command. We will hit learn and we're","source":"reviewed-transcript"},{"start":77.82,"text":"presented with a pop-up. We then come to the side of the hub with the holes and","source":"reviewed-transcript"},{"start":83.54,"text":"push our remote button and when it gets it and it learns it the modal will go","source":"reviewed-transcript"},{"start":91.14,"text":"away and we're then shown it says clear or test. Clicking the test button will","source":"reviewed-transcript"},{"start":98.06,"text":"send that command to the device via the IR blaster. IR blaster needs to be","source":"reviewed-transcript"},{"start":108.4,"text":"plugged into the bottom of the air quality device from GRIT and the emitting eye needs to be placed","source":"reviewed-transcript"},{"start":116.96,"text":"in front of the receiver on the air filter next we can train the speed command so click learn","source":"reviewed-transcript"},{"start":127.28,"text":"and click the speed button on your remote again pointing at the holes on the side of the hub","source":"reviewed-transcript"},{"start":132.88,"text":"and it learns it. I typically don't train the off command but instead GRIT will remove power","source":"reviewed-transcript"},{"start":141.86,"text":"to the air filter via an internal relay instead of using the remote's off command. This helps","source":"reviewed-transcript"},{"start":148.88,"text":"ensure that the air filter is in the correct state when adjusting on off and speed commands.","source":"reviewed-transcript"},{"start":156.62,"text":"Next, we can train it on the RF if that's the type of remote we have.","source":"reviewed-transcript"},{"start":163.46,"text":"So we can click over to RF remote and grab an RF remote.","source":"reviewed-transcript"},{"start":170.5,"text":"Now, RF remotes, the antenna of where to place the new RF remote is different.","source":"reviewed-transcript"},{"start":178.98,"text":"It's not over here, but instead, it's directly on top of the buttons.","source":"reviewed-transcript"},{"start":183.76,"text":"So let's click the learn button and we're going to be learning the on command.","source":"reviewed-transcript"},{"start":195.66,"text":"And so you press the button and now we're presented with a screen that shows the different","source":"reviewed-transcript"},{"start":202.78,"text":"commands that GRIT heard.","source":"reviewed-transcript"},{"start":207.28,"text":"And we can test these commands by clicking the test button.","source":"reviewed-transcript"},{"start":214.1,"text":"And when we find the one that works correctly, we can hit the save button.","source":"reviewed-transcript"},{"start":222.78,"text":"Now GRIT has learned the RF command for on for this particular remote.","source":"reviewed-transcript"},{"start":229.88,"text":"The same goes for the speed command exactly like we did last time.","source":"reviewed-transcript"},{"start":233.9,"text":"We place the remote over the buttons.","source":"reviewed-transcript"},{"start":239.58,"text":"We can test the different commands that it heard during that learning session and click","source":"reviewed-transcript"},{"start":247.48,"text":"save.","source":"reviewed-transcript"},{"start":248.48,"text":"And we're done.","source":"reviewed-transcript"}]},{"slug":"gate-power","category":"tutorials","title":"GRIT Gate Power","description":"Understanding power requirements and wiring for GRIT automated blast gates.","tags":["gate power","wiring","power supply","voltage","blast gate","electrical"],"takeaways":["Match red to positive and white to negative when wiring the Gate Control connector.","Daisy-chain Gate Controls to reduce the number of home runs to the Power Bank.","For intermittent power, check wire seating, connector engagement, and strain caused by insufficient slack."],"chapters":[{"start":0,"title":"Prepare the Gate Control connector"},{"start":38,"title":"Insert and secure the power wires"},{"start":83,"title":"Plug in the actuator and daisy-chain gates"},{"start":165,"title":"Troubleshoot an unpowered or intermittent gate"},{"start":205,"title":"Connect the system to the Power Bank"}],"passages":[{"start":0,"text":"Now that we have the gate control and slide guide installed to our metal blast gate, it's time to power the actuator.","source":"reviewed-transcript"},{"start":10,"text":"And all of your actuators are going to come with a green connector, no matter what size, and this is what you're going to connect your wires to.","source":"reviewed-transcript"},{"start":17,"text":"And we'll start off by noticing that we have a negative and a positive labeled on the green connector to ensure that we're connecting the wires into the right place.","source":"reviewed-transcript"},{"start":28,"text":"If you notice, we have two screws that will loosen up the openings for us to stick the wires in.","source":"reviewed-transcript"},{"start":35,"text":"And what I'm going to do is I'm just going to turn those counterclockwise and loosen them up all the way.","source":"reviewed-transcript"},{"start":40,"text":"What you'll notice is on the inside of the green connector, there's a bar that moves up and down and opens up for us to insert the wires into.","source":"reviewed-transcript"},{"start":50,"text":"So now that I have this open, I'm going to grab my first set of wires.","source":"reviewed-transcript"},{"start":55,"text":"I'm going to make sure that my red goes into positive and white into negative.","source":"reviewed-transcript"},{"start":60.5,"text":"Then I'm going to grab a second set.","source":"reviewed-transcript"},{"start":63.66,"text":"This is because the GRIT system allows you to daisy chain your power from one gate to","source":"reviewed-transcript"},{"start":70.36,"text":"the next.","source":"reviewed-transcript"},{"start":71.94,"text":"I have both wires in and I'm going to tighten the screws nice and tight.","source":"reviewed-transcript"},{"start":78.68,"text":"Those bars should have clamped down onto the screws.","source":"reviewed-transcript"},{"start":81.5,"text":"I give it a good pull.","source":"reviewed-transcript"},{"start":83.46,"text":"I make sure that it's secure in there.","source":"reviewed-transcript"},{"start":86.36,"text":"And that's all you have to do to get the wires","source":"reviewed-transcript"},{"start":90.08,"text":"into the connector.","source":"reviewed-transcript"},{"start":91.26,"text":"And you'll take this now,","source":"reviewed-transcript"},{"start":93.34,"text":"and it will just plug right into your actuator.","source":"reviewed-transcript"},{"start":97.22,"text":"So you can see here,","source":"reviewed-transcript"},{"start":98.58,"text":"we have our metal blast gates installed,","source":"reviewed-transcript"},{"start":101.48,"text":"our actuator and slide guides all installed,","source":"reviewed-transcript"},{"start":104.6,"text":"and we've wired everything.","source":"reviewed-transcript"},{"start":106.54,"text":"And I'd like to point out that we have our gates daisy chain.","source":"reviewed-transcript"},{"start":110.92,"text":"So I've just come into one green connector with the supply","source":"reviewed-transcript"},{"start":114.98,"text":"and then kept it going through,","source":"reviewed-transcript"},{"start":116.58,"text":"bounced over to the next and the next.","source":"reviewed-transcript"},{"start":118.76,"text":"And this has just created a much easier,","source":"reviewed-transcript"},{"start":121.16,"text":"cleaner installation method.","source":"reviewed-transcript"},{"start":123.02,"text":"So I only have one home run going to my power supply","source":"reviewed-transcript"},{"start":126.98,"text":"and these just daisy chain from one to the next.","source":"reviewed-transcript"},{"start":129.96,"text":"Things to consider if you run into any problems","source":"reviewed-transcript"},{"start":132.52,"text":"while doing this, for example,","source":"reviewed-transcript"},{"start":134.74,"text":"if you have one gate that's not on, check your connection.","source":"reviewed-transcript"},{"start":139.44,"text":"It could be a variety of reasons.","source":"reviewed-transcript"},{"start":141.1,"text":"One, it could be your wires aren't seated correctly","source":"reviewed-transcript"},{"start":144.82,"text":"into the green connector.","source":"reviewed-transcript"},{"start":146.56,"text":"It could also be you don't have it pushed in all the way.","source":"reviewed-transcript"},{"start":150.34,"text":"Or sometimes people don't leave enough slack on their wire","source":"reviewed-transcript"},{"start":154,"text":"and the tension on the wire can cause the green connector","source":"reviewed-transcript"},{"start":157.5,"text":"to flicker a bit and it's intermittent","source":"reviewed-transcript"},{"start":160.46,"text":"in terms of the light coming on on the device.","source":"reviewed-transcript"},{"start":163.82,"text":"After you've wired up all of your gate controls,","source":"reviewed-transcript"},{"start":167.74,"text":"you have one last hookup at your power bank to energize all of the gate controls.","source":"reviewed-transcript"},{"start":174.18,"text":"And here we have what plugs into your power bank.","source":"reviewed-transcript"},{"start":178.6,"text":"And it has a red and a black button to release the opening.","source":"reviewed-transcript"},{"start":185.04,"text":"And in this case, I can press both of them at the same time.","source":"reviewed-transcript"},{"start":188.98,"text":"And I make sure that my red's going into red and the other wire is going into negative.","source":"reviewed-transcript"},{"start":193.84,"text":"I pull on them a little bit to make sure they're secure.","source":"reviewed-transcript"},{"start":196.14,"text":"and this now would plug into the power bank","source":"reviewed-transcript"},{"start":200.86,"text":"and energize the whole system.","source":"reviewed-transcript"},{"start":203.32,"text":"You can, just like in daisy chaining,","source":"reviewed-transcript"},{"start":205.56,"text":"you can put two sets of wires in here","source":"reviewed-transcript"},{"start":207.7,"text":"if you have different directions to go.","source":"reviewed-transcript"},{"start":209.58,"text":"Our power bank actually has two outputs,","source":"reviewed-transcript"},{"start":212.84,"text":"so this could give you four different directions to go","source":"reviewed-transcript"},{"start":216.6,"text":"if you truly need that.","source":"reviewed-transcript"},{"start":218.08,"text":"But remember that you can daisy chain all of your gates,","source":"reviewed-transcript"},{"start":221.36,"text":"and this makes for a much cleaner, easier installation.","source":"reviewed-transcript"}]},{"slug":"troubleshoot-app-wont-load","category":"troubleshooting","title":"Troubleshooting: GRIT App Won't Load","description":"Quick fixes for when the GRIT App isn't loading properly on your phone or tablet.","tags":["troubleshooting","app","won't load","phone","tablet","mobile","grit app","fix"],"takeaways":["A blank GRIT app screen can result from the phone and Hub being on different Wi-Fi networks.","If the Hub's IP address changed, delete and recreate the home-screen shortcut from the Hub QR code.","Reserve a static IP address for the Hub in the router to prevent repeat shortcut failures."],"chapters":[{"start":0,"title":"Diagnose a blank app screen"},{"start":15,"title":"Check the phone and Hub Wi-Fi"},{"start":30,"title":"Recreate the QR-code shortcut"},{"start":47,"title":"Reserve the Hub IP address"}],"passages":[{"start":0,"text":"So if you're in a shop and you try to bring up the app using your phone or your tablet","source":"reviewed-transcript"},{"start":6.04,"text":"and you click on the button on the home screen and then you're just presented with this white","source":"reviewed-transcript"},{"start":10.2,"text":"screen on your phone and nothing loads, what should I do?","source":"reviewed-transcript"},{"start":13.76,"text":"The issue could be one of a few things, so let's walk through what those could be.","source":"reviewed-transcript"},{"start":17.52,"text":"First it could be that did you connect your hub to your local Wi-Fi network?","source":"reviewed-transcript"},{"start":22.56,"text":"If you did, make sure your phone is also on that Wi-Fi network.","source":"reviewed-transcript"},{"start":26.96,"text":"If you created your shortcut on your phone when you were connected to a different network","source":"reviewed-transcript"},{"start":33.08,"text":"with the hub, that means the IP address has changed.","source":"reviewed-transcript"},{"start":36.8,"text":"So you'll want to go back through, delete the home screen icon, and then recreate it","source":"reviewed-transcript"},{"start":42.26,"text":"by taking a scan of the QR code on the side of the hub.","source":"reviewed-transcript"},{"start":46.08,"text":"If the IP address of your hub continuously changes, the best thing to do is to go into","source":"reviewed-transcript"},{"start":51.92,"text":"your local router and set a reserved or static IP address for the hub. This will","source":"reviewed-transcript"},{"start":60.42,"text":"make it so that it doesn't change ever again.","source":"reviewed-transcript"}]},{"slug":"troubleshoot-collector-missing-commands","category":"troubleshooting","title":"Troubleshooting: Dust Collector Missing Commands","description":"What to do when your dust collector isn't responding to commands from the iR/RF Collector module.","tags":["troubleshooting","dust collector","missing commands","ir","rf","collector","signal","fix"],"takeaways":["The iR/RF Collector reproduces the commands from the dust collector's remote.","Move the module closer to the dust collector when on/off commands are intermittent.","Relearn the remote commands in the GRIT app if repositioning does not resolve the issue."],"chapters":[{"start":0,"title":"How the iR/RF Collector sends commands"},{"start":10,"title":"Move the module closer"},{"start":21,"title":"Reprogram commands in the GRIT app"}],"passages":[{"start":0,"text":"The iR/RF Collector device mimics the remote commands that come with the remote for your collector.","source":"reviewed-transcript"},{"start":10,"text":"If the commands to turn it on and off are spotty, first thing to do is to move that module closer to the dust collector.","source":"reviewed-transcript"},{"start":20,"text":"If that doesn't work, then the next step is to reprogram those remote commands within the GRIT app.","source":"reviewed-transcript"},{"start":29,"text":"S 상ATION","source":"reviewed-transcript"}]},{"slug":"troubleshoot-hub-network-reset","category":"troubleshooting","title":"Troubleshooting: Hub Network Reset","description":"How to reset your GRIT Hub's network settings when you need to reconnect or change WiFi networks.","tags":["troubleshooting","hub","network","reset","wifi","connection","settings","fix"],"takeaways":["Hold the GRIT Hub side button for a full 20 seconds to clear incorrect Wi-Fi settings.","Allow about one minute for the Hub to restart and broadcast its setup Wi-Fi network.","Reconnect to the GRIT Hub Wi-Fi and repeat the local-network setup with the correct password."],"chapters":[{"start":0,"title":"When a network reset is needed"},{"start":10,"title":"Hold the side button for 20 seconds"},{"start":25,"title":"Reconnect to the Hub setup network"}],"passages":[{"start":0,"text":"If you are trying to set up the GRIT Hub to connect to a local Wi-Fi and the Wi-Fi password","source":"reviewed-transcript"},{"start":10.52,"text":"might not have got put in the right way, the way you fix that is you hold the side button","source":"reviewed-transcript"},{"start":15.68,"text":"on the Hub for 20 seconds, a full 20 seconds.","source":"reviewed-transcript"},{"start":18.9,"text":"Make sure you count 1-1000 and this will reset the network settings.","source":"reviewed-transcript"},{"start":24.16,"text":"The Hub's initial boot, when it creates its own Wi-Fi network, usually takes about a minute.","source":"reviewed-transcript"},{"start":30,"text":"It will then broadcast the GRIT Hub Wi-Fi again.","source":"reviewed-transcript"},{"start":34,"text":"You can connect to that and then you can again try to move it to your local network.","source":"reviewed-transcript"}]}]}